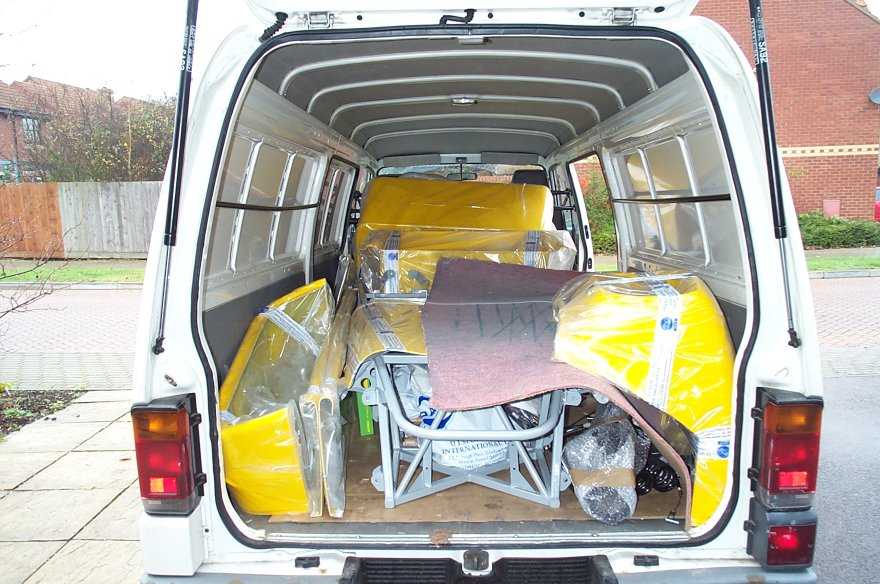
16th November
Collected the kit, took up more space than I expected in the van, glad I decided not to collect the engine at the same time, there would not have been enough room!. Sorted the bits out, everything appears to be here, only problem is a pedal rubber falling off because it was split.
17th November
Fitted the bushes so they would not get lost, found homes for some more bits in the shed and loft, have to make space for Tim’s compressor and the engine that I should be collecting on Wednesday. Finally managed to start fitting the near side floor panel, spent ages on the first one, the second was much faster, started drilling some of the holes.
18th November
Took A frame to work and fitted bushes, ordered some fuel pipe and sorted out fitting for Tim’s compressor to the air riveter. Finished drilling the holes in the n/s floor panel
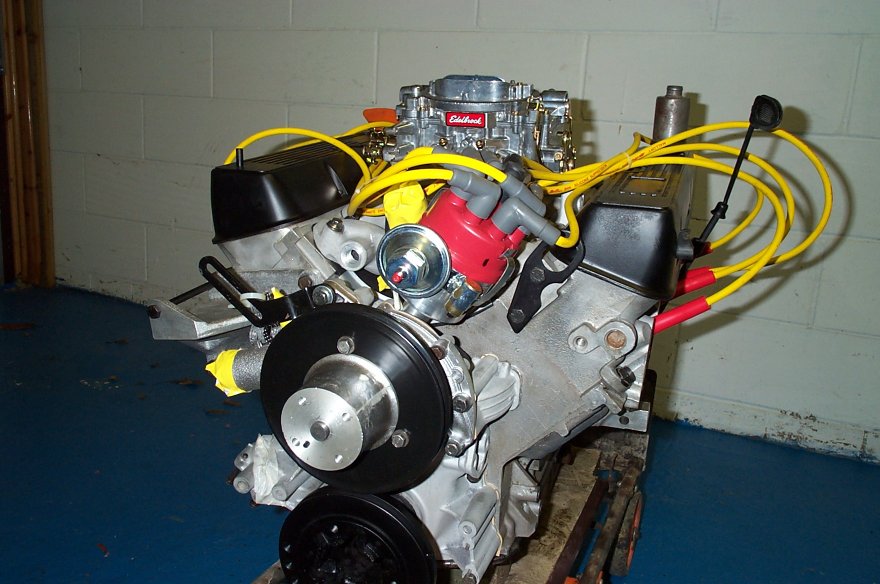
20th November
Picked up engine from Abbey Sports Cars and quick rack from Dax that was not in when I collected the kit.
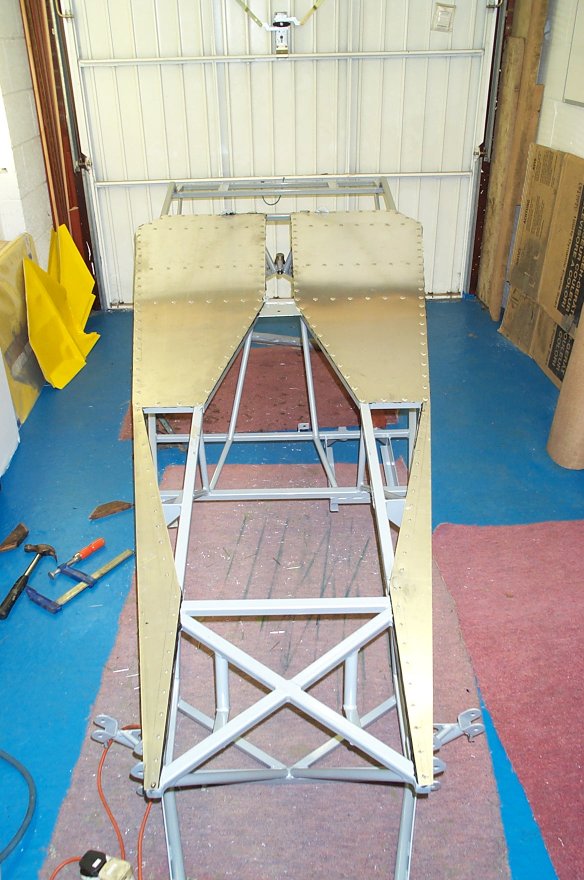
23rd November
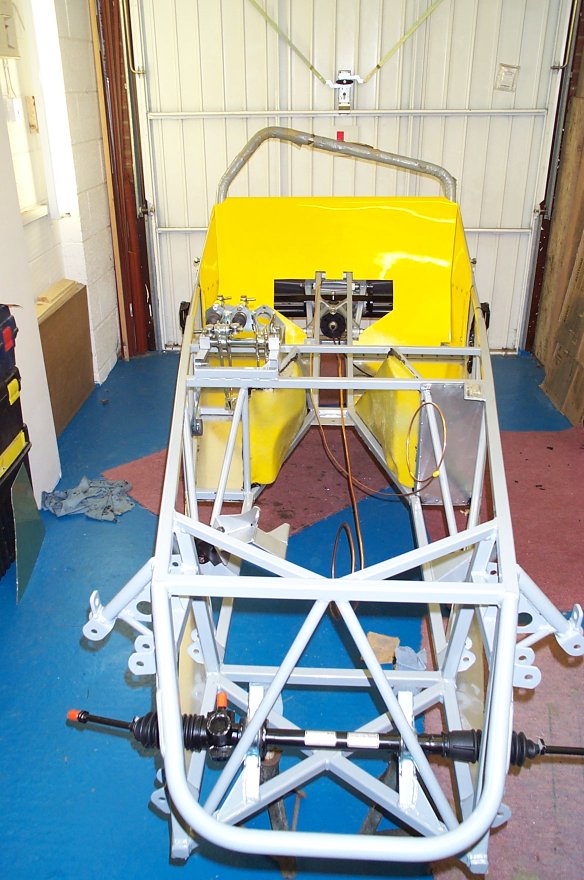
Fitted the floor panels and infill panels, perhaps used a little too much Wurth but I prefer too much to not enough. The pneumatic pop rivet gun made light work of the riveting, in fact it was so easy I thought it was not working properly! Then turned the chassis over and fitted the diff after spending a little time working out the washers. I left the chassis on the floor to fit the diff so I did not have to lift it up (the diff), fitted the top bolts, then the back bolts then the front ones this had the diff fitted in about 15 minutes. I then lifted the chassis on to axle stands and fitted the De-Dion tube, A frame, radius arms and dampers.
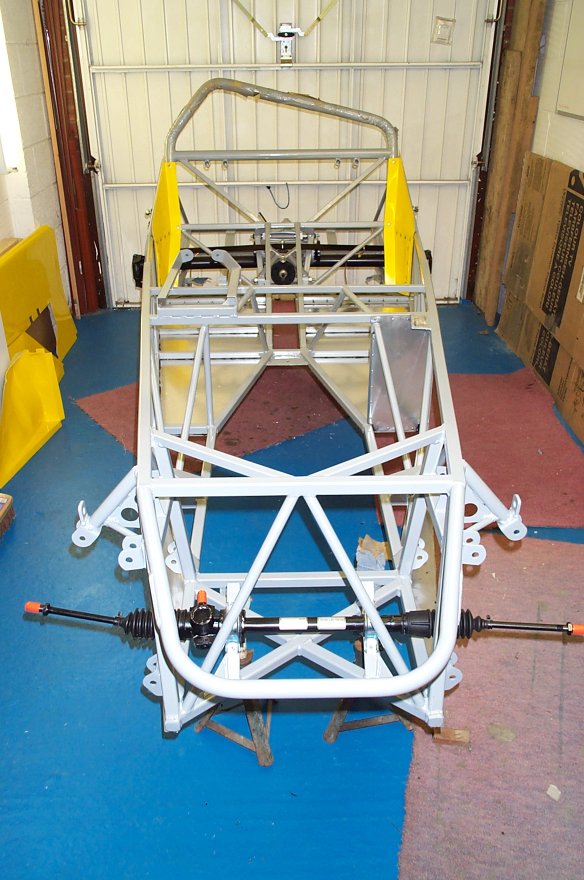
24th November
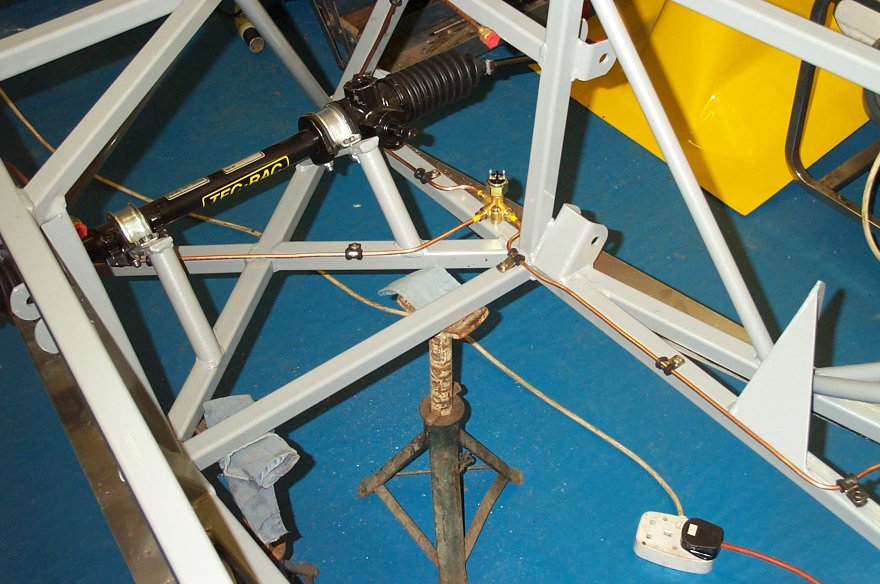
Fitted the steering rack then made a cardboard template for the passenger’s side foot well and used that to cut the panel which went in with a little bit of bending. Then trial fitted the inner foot well fiberglass bits once I worked out how they fitted (thanks to Trevor Turner's pictures in his build diary). I had been putting off fitting the bulkhead side panels so after lunch I printed some pictures out of how other people fitted them, they were quite fiddly to fit and I managed to break a drill bit (the first of many I suspect) in the process, I must remember to throw them away when they get blunt! After that I got the brake pipes out to work out which went where and had a go at bending one, but decided I was too tired and would call it a day.
1st December
I have decided that I will update once a week as this is the best way to get into a routine and try and be a bit organized. I have bribed one of my sons to design a proper web site for me so hopefully we will have that up and running in a few weeks as I will soon run out of space here.
This week I have fitted the inner fiberglass foot well panels, they went in without much trouble but there were some gaps where Dax had cut away a bit too much material away, the smaller gaps were filled with “black death” and a small piece of aluminum was cut to cover the largest one at the top of the drivers side panel. Some brackets were made to attach the fuel pump and regulator, I am not totally happy with them but had got to the stage where I had to do something. The holes for the pedal box were drilled so I can look at making the cover that everyone makes to fill the gap where the pedals are (I can’t understand why Dax don’t supply that as it seems essential to me). Then the rear brake pipes, fuel pipe and rear wiring loom were draped in roughly the right place so I can work out where they all are going to go. The rear harness (Dax supplied) is going to require some work on it, because as far as I can tell it was designed for an IRS car. The harness starts (or finishes) at the O/S rear lamp, then goes to the fog lamp and the number plate lamp, no problem there. The next connection is for the N/S rear lamp which means the loom has to go back towards the centre of the rear to put the reversing lamp in the correct place, but to get to the front of the car the loom can’t do that on a De Dion chassis as there is nothing to attach is too (unlike the IRS one that has support tube there), the loom will have to go forward on the N/S which means that the fuel pump feed and tank sender cables won’t reach. The only way around this I can see is to split the pump feed and tank sender wire out from the harness about 18 inches closer to the front of the harness so they can go to the O/S of the car as soon as they emerge from the transmission tunnel and then extend the reversing light leads to reach.
8th December
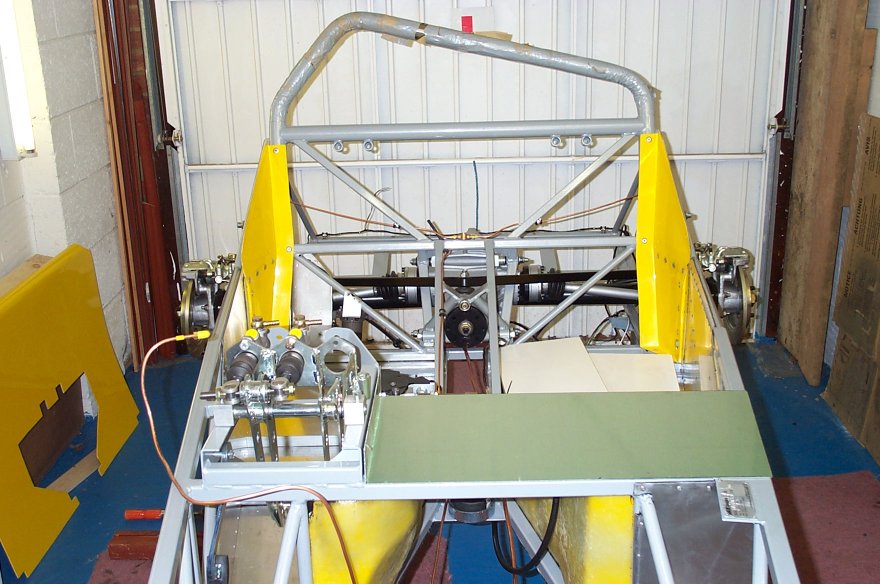
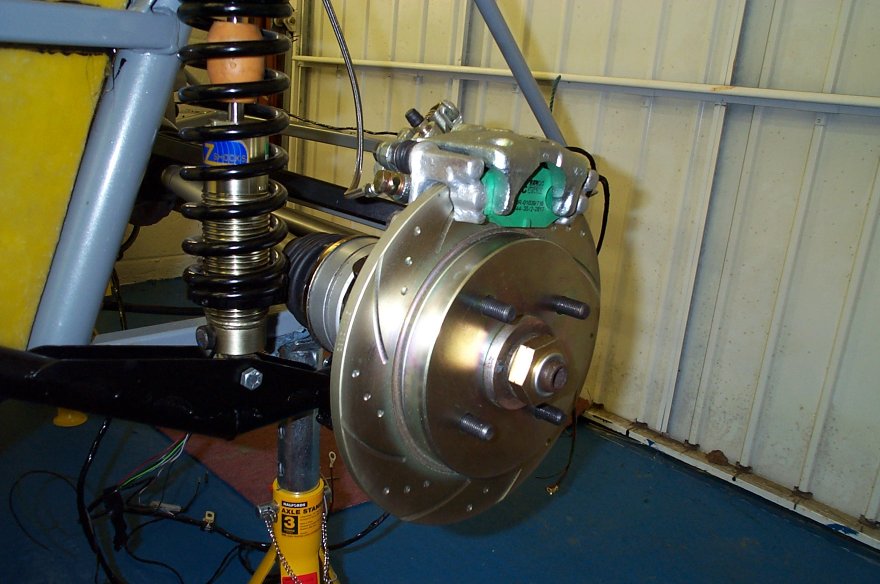
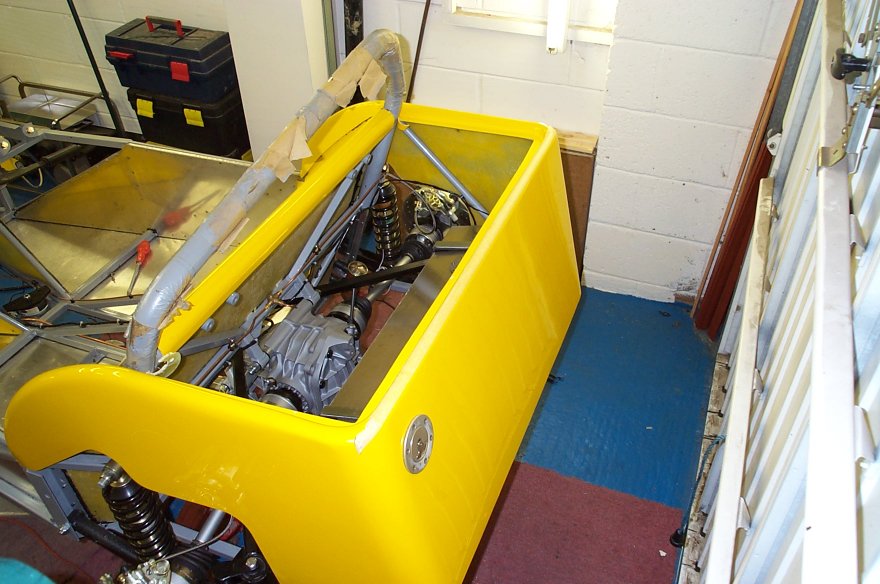
The rear hubs and drive shafts were fitted then the calipers, EBC Turbo Grove discs and Greenstuff pads went on, now the back end is looking quite like a car! So I fitted the handbrake and cables to complete it, the clevis pin supplied by Dax for connecting the two cables together seem far too long like some of their bolts. The clearance between the fuel pump and drive shaft looks fine but the boot on the inner N/S drive shaft is touching the A frame, it looks like when the suspension is in its normal position it will be all right but I will need to check it when the car is off the axle stands. Then I decided to get the tub out of the shed and see how it would fit. After a couple of hours of trial positioning and trimming slightly I felt I had it positioned as well as possible. The underneath foreword edge does not quite reach the cross member, but after checking a few build diaries it looks like most people have this problem. As a consequence of trial fitting the tub I decided it would be better to fit the inside aluminum panels first, and I had not borrowed the pneumatic pop rivet gun from work! Still some seventy holes and pop rivets later one side was in, the 1\8 rivets are not as bad as the larger ones used on the floor, but my hands were covered in “black death” again (next time I might remember to were the gloves my wife has sorted out for me!) I managed to get the holes drilled in the second one before my “donor car” arrived. I had managed to pick up quite cheaply a Sierra 2.0 that would cost too much to get through its next MOT, it has ABS which means that its calipers are the bigger ones and with the help of Dax’s caliper spacers and 4X4 discs should provide adequate braking. Just enough time to remove the steering column so I can take it to Dax for modification next week.
15th December
The weather was turned very cold this week so not much was done during the week, I managed to look at the front and dash harness and label most of the connections which should make it easier to work out where to fit it. The pneumatic pop rivet gun was borrowed from work and the driver’s side inner aluminum panel fitted. I did manage to get to Dax’s during the week and pick up a couple of steering uj’s and some closed cell foam that were missing from when I pick up the kit. The weather improved on Saturday so I was able to remove the front suspension parts I wanted from the donor car and dismantle them ready for cleaning. Next I thought I better have a go at fitting the front brake pipes, getting the pipes bent neatly tries my patience but I managed to get quite a bit done before I decided I had had enough.

22nd December
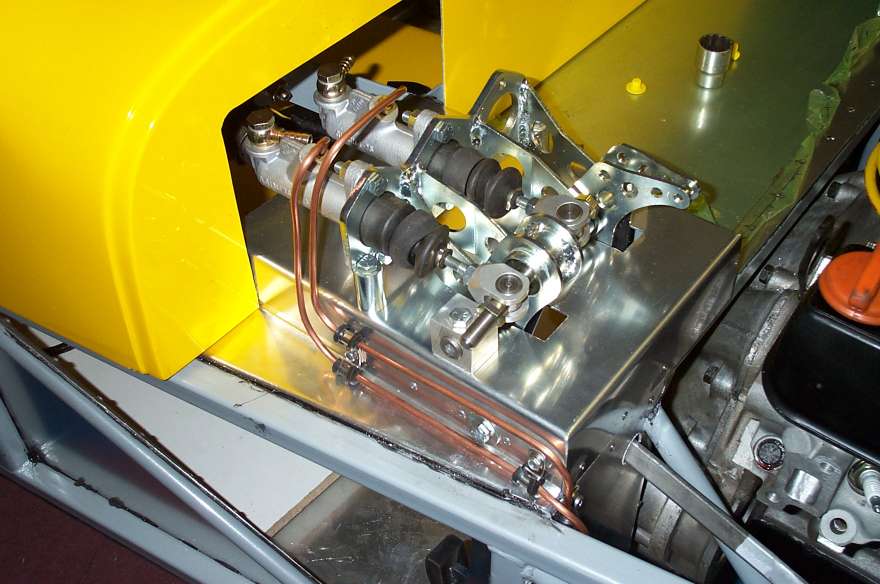
A bit of time off work this week so quite good progress has been made between the Christmas shopping. Rear harness is now in place, the fuel pipe has been fitted using a route that I hope will still look alright when the engine and gearbox is fitted. Rear bulkhead panel is riveted in position and the tub has been fitted. Lots of little jobs have been completed like fitting the throttle cable and return spring to the carb, fitting the fuel filler, cutting the hole in the scuttle panel for master cylinders, and the n/s side panel has been trimmed. I have also been able to take all the parts I want off the donor car including the delay wipe relay and switch which thanks to DROC “Hints & tips” I now know how to make work although it will probably be a task left till after the SVA test.
29th December
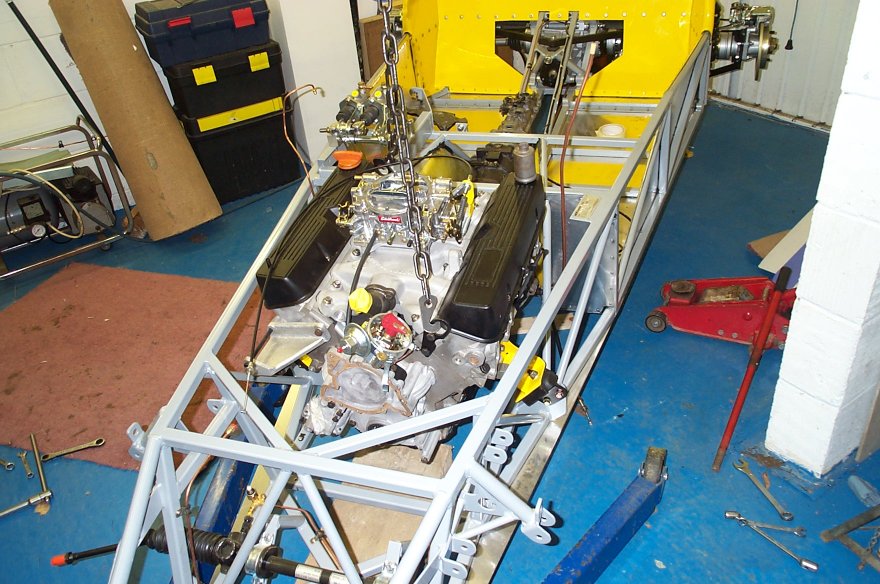
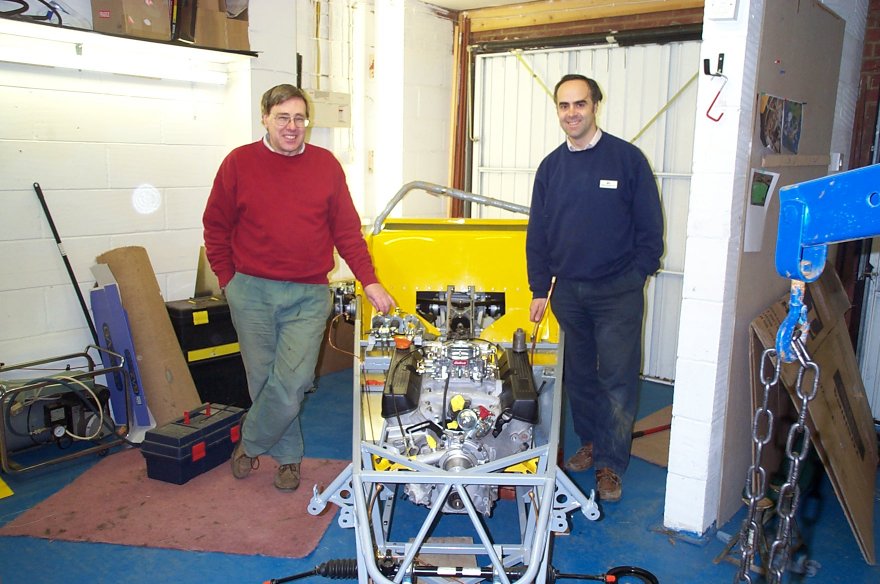
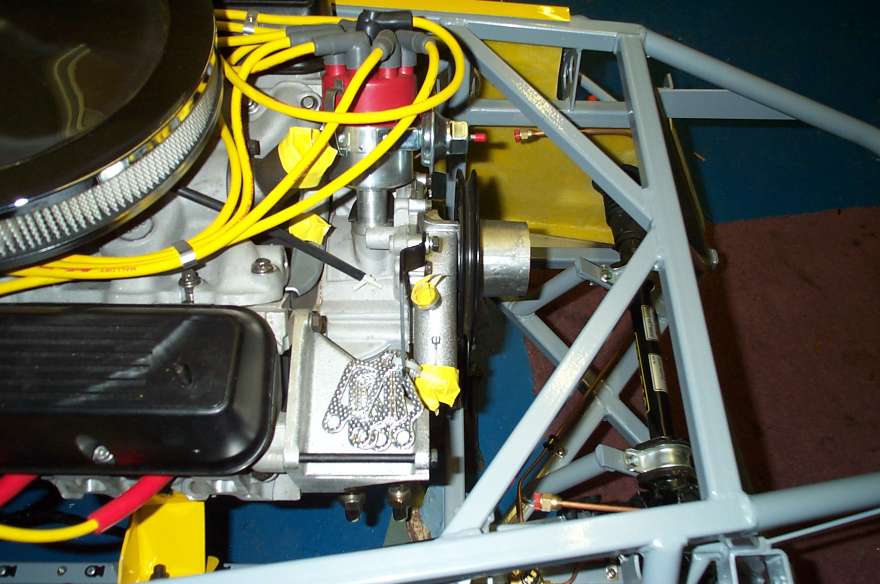
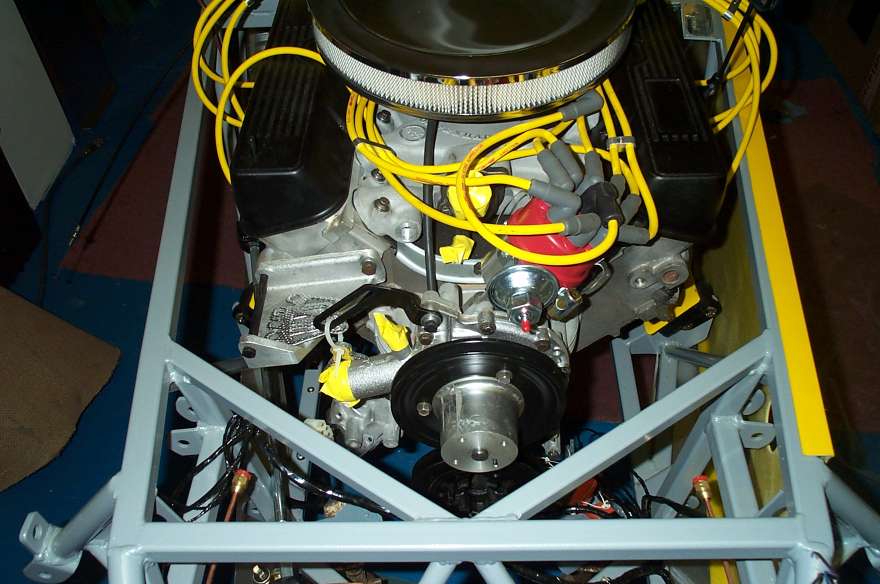
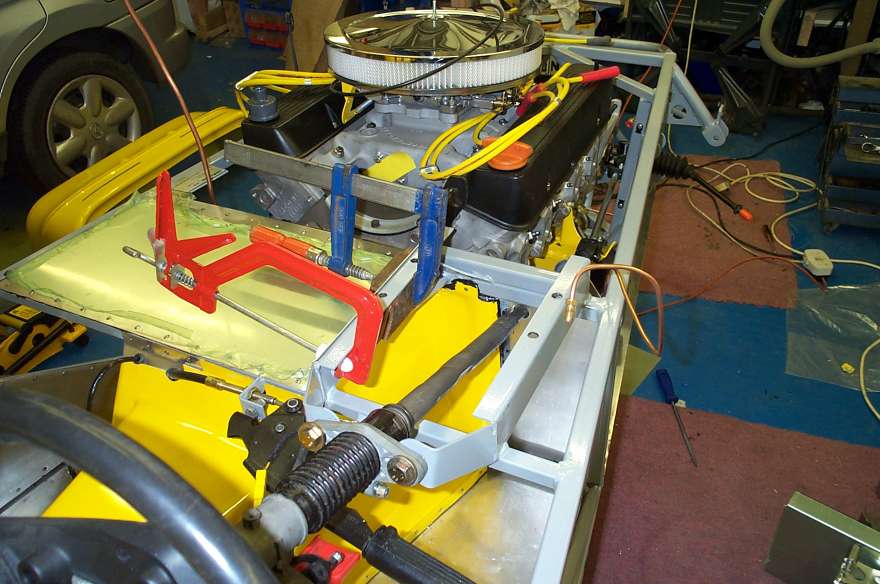
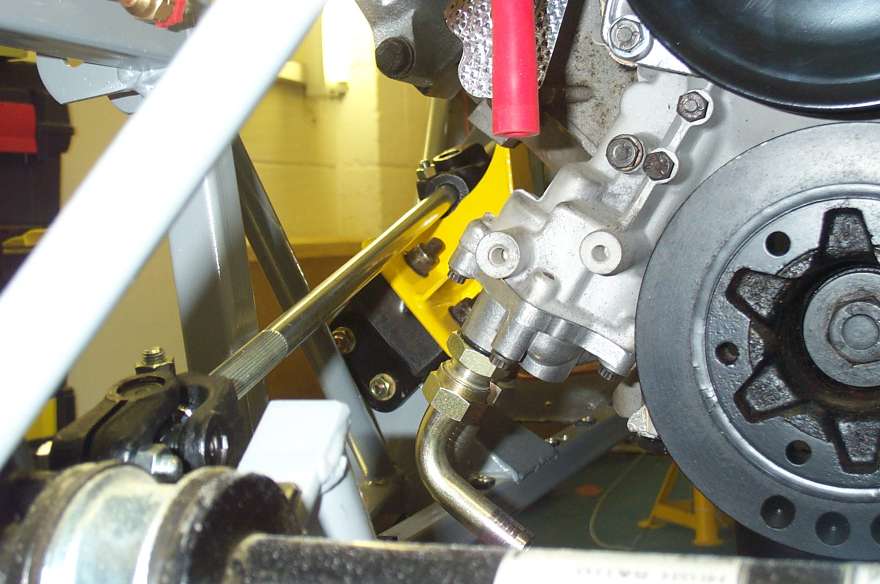
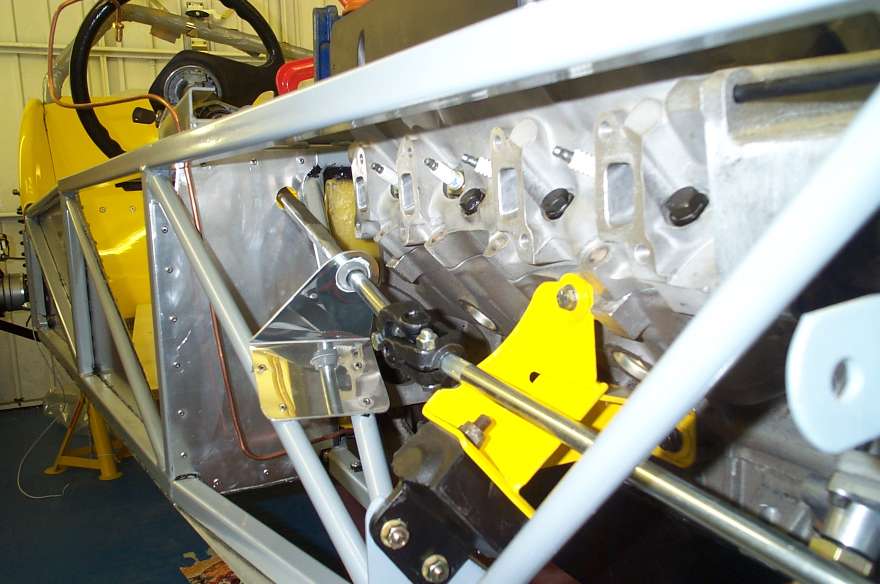
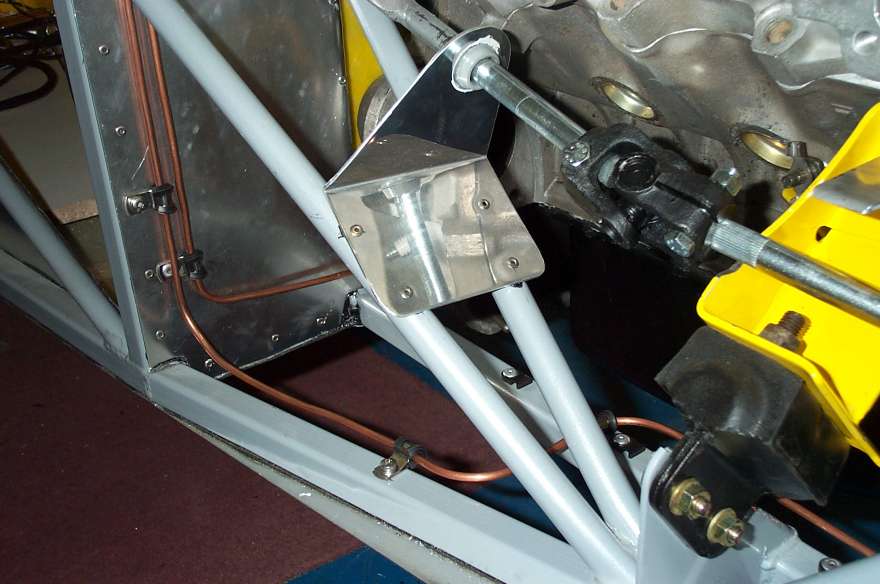
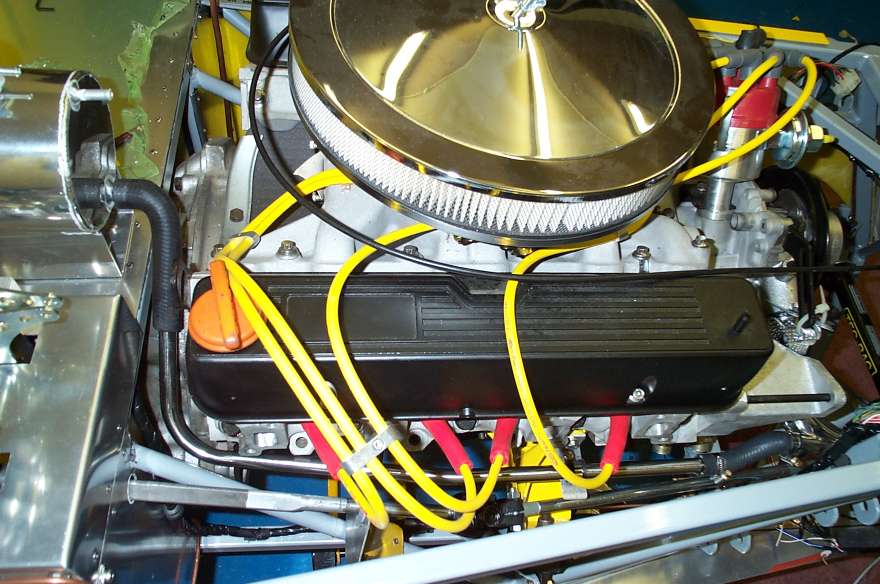
Not much done this week with Christmas celebrations but I did collect the gearbox from “Gearboxman” on Monday and got it bolted to the engine. On Saturday my friend Tim came round and gave me hand to put the engine in. We moved the car around enough to enable us to get access for the engine crane, dropped the front so it was resting on a piece of wood on the garage floor and after removing the water pump and bottom pulley maneuvered the engine into the correct position, it was very tight but there was no major problem getting it in. Once in place it became apparent that the o/s/r of the gearbox was hard against the fiberglass side panel, time to stop for lunch. After the break we decided to remove the triangular bracket supplied by Dax that bolts between the gearbox and the rubber mounting with a view to elongating the hole for the rubber mounting thus enabling the gearbox to be moved into the correct position. Close inspection of the bracket revealed that the mounting hole was offset and we had got it the wrong way round, I decided to elongate the hole a small amount as well for good luck so we would be sure to be able to get it in the correct position. This worked and we were able to get the gearbox in the correct position. Thanks to Tim Hoverds build diary we had removed a small amount of the lug on the gearbox that would hit the chassis on the near side before we put the engine in so the gearbox has a couple of millimeters clearance each side.
5th January
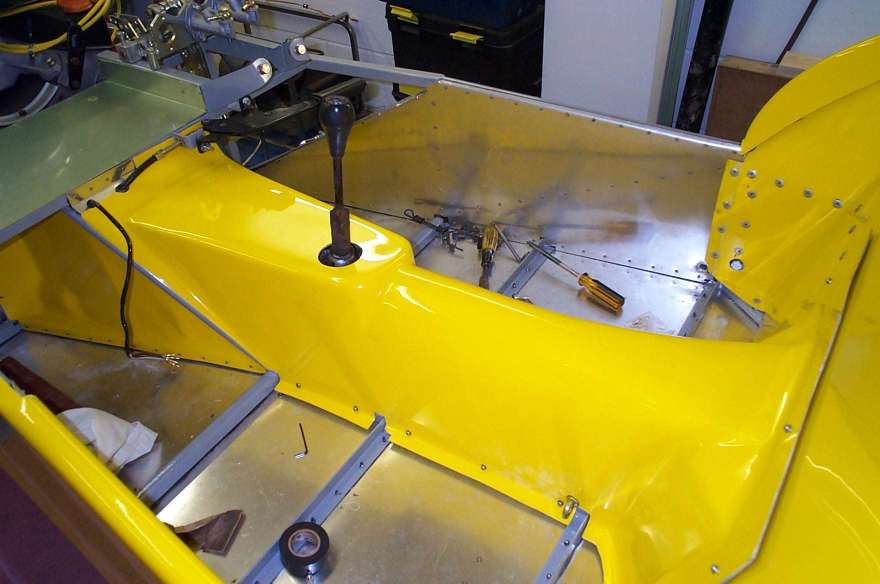
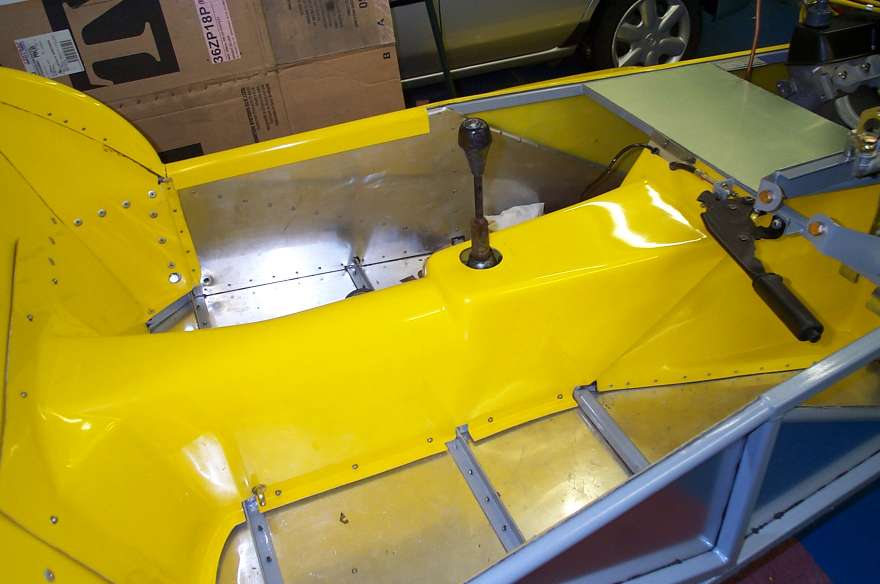
More celebrations this week and some very cold weather but managed to get the transmission tunnel fitted, this was quite tricky as it fits in a “V” so finding the right bits to trim involved a lot of trial fitting after removing small amounts. On the off side the flange is almost touching the floor but it is slightly higher on the near side as I felt that unless I removed the flange that sat on the diagonal it would go no lower and I was not prepared to do that. I may well remove most of the flange if it gets in the way of fitting the carpet later. A small piece of aluminum was made to allow the rear harness and the handbrake cable to enter the cockpit and not be disturbed when the tunnel is removed.
It was too cold to venture out in the garage during the week so I set up my proper web site, at the week end a visit to “Kit Fit” enabled me to acquire the correct steering column as the one from my late donor car would not fit and the scrap yard that promised to deliver me one before Christmas was lost it in transit. That’s the second item I have ordered from a scrap yard that was lost by the carriers! I will not be trying that route again to obtain parts.
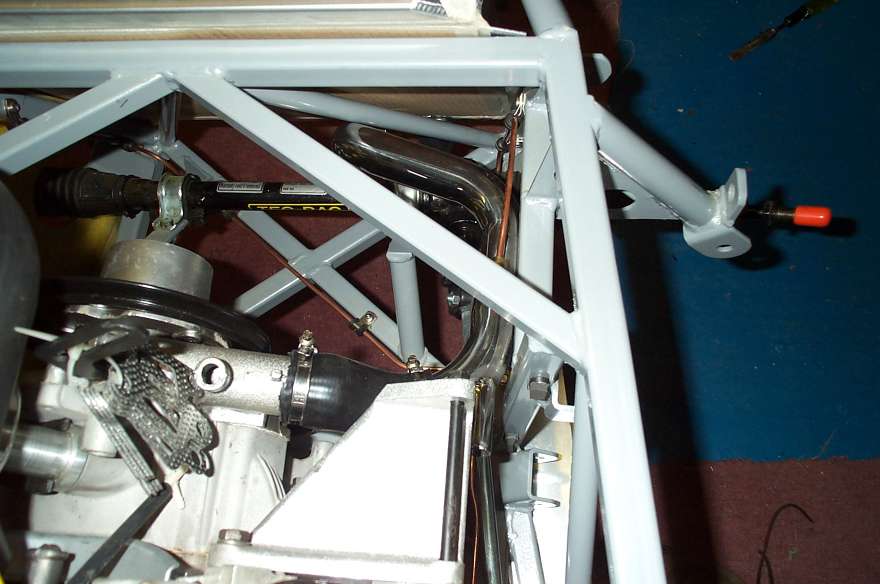
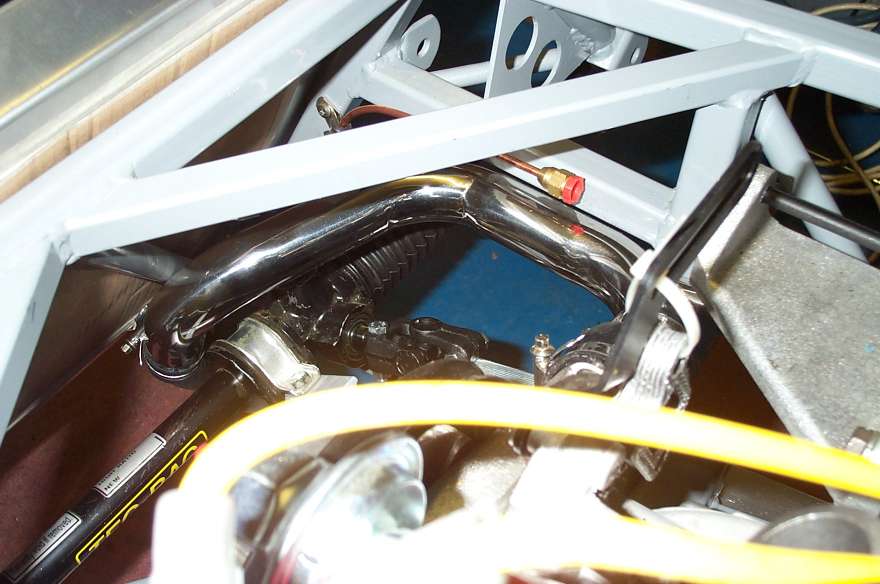
Now all I had to do was fit the steering column so that it missed the exhaust manifold that I do not have yet, did not require to big a chunk taken out of the engine mounting and put the steering column cowl in the correct place with reference to the dash board that I do not have yet, and was in the correct position for driving the car when I am sitting in the seat I also have not got yet. Time will tell if I managed to get any of these things correctly. With the steering column fitted I was able to mark where the hole was required in the driver’s side foot well end panel, cut it and the fit the panel with some difficulty because the engine was in the way (but the engine had to be in place to work out where the steering column would go).
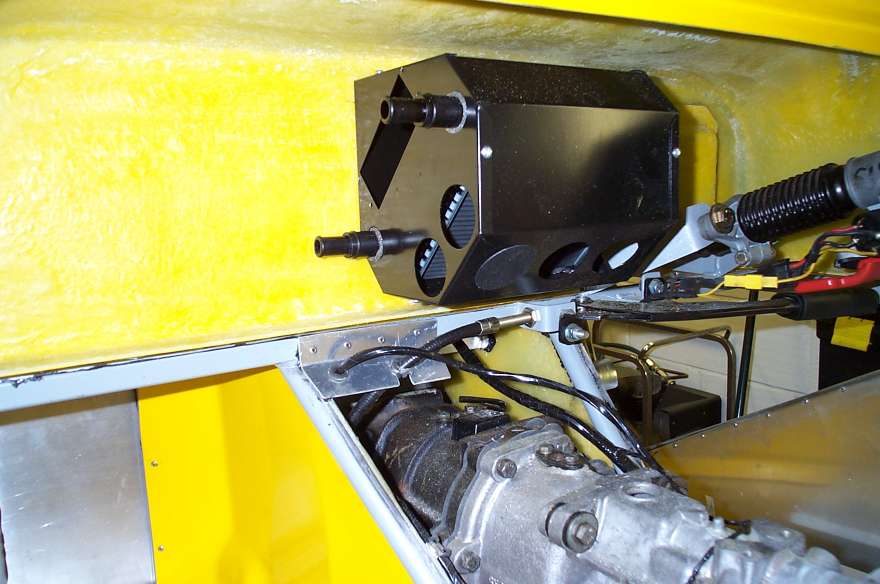
The remote oil filter housing has been sat on my desk for a few days now and one day I decided to inspect it closely, this revealed half a dozen pieces of swarf still inside it, some on the outlet side! This would have made a mess of my crankshaft if it had got in the engine, so remember to check your remote filter before fitting.
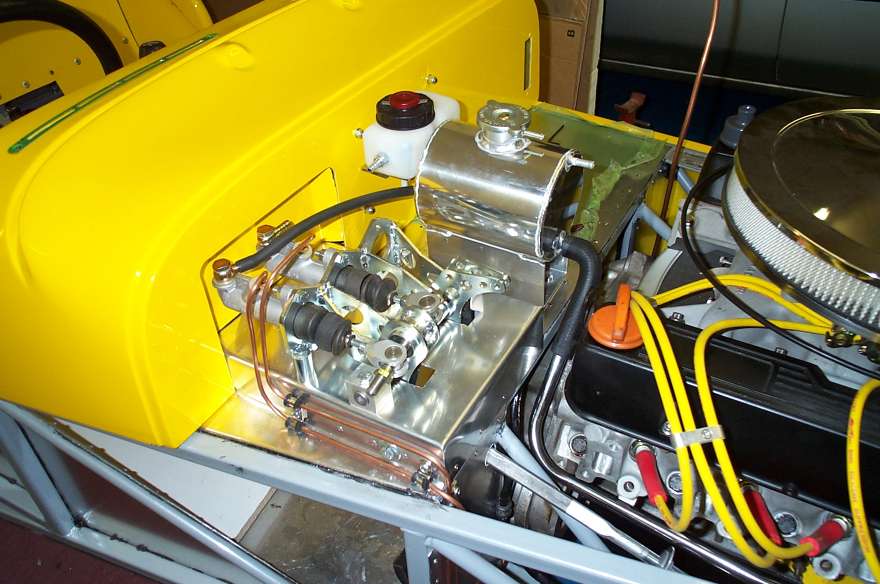
A visit to Dax during the week allowed me to acquire a heater, a radiator, a header tank and a hose kit, looks like the cooling system is next on the agenda. Before I started on this the cover to the pedal box was finished (now that I was certain of where the pedals final position was) and fitted with the foot well top covers. As usual I seemed to get more “black death” where it should not be than in the right place, still it seems to come of your hands after a few days.
The Radiator was next, but this proved to be not a simple as it first seemed, the build manual says “Position the radiator laterally so that it is central between side chassis rails (no problem here) and vertically, so that the top hose will just pass over the upper chassis rail” that also seemed quite simple, so it was fitted. Thought I better try the nose cone, so that was rescued from the shed and put roughly in the correct place, but what’s this, it hits the bottom header tank, time to stop for lunch and check a few build diary’s. A quick check of Trevor’s and Tim’s site showed their radiators to be nearly 2 inches higher than mine was! After lunch the radiator was raised the required amount, the nose cone now fits and it looks like I may even be able to connect the bottom hose. I purchased the hose kit from Dax that is for an injection V8 and mine is a carb version with a P6 front end (a bit more compact) so I expected a few problem making the hoses fit, but after some “adjusting” of rubber hoses I managed to get the bottom hose sorted. I was not sure about the top hose yet as the picture of Trevor’s car does not appear to have a vent (it is the highest point of the system) so I will have to contact him and see if it is necessary. Nothing for it now but to finish off the metal brake pipes to the master cylinders. These really try my patience and never seem to be completely straight.
Continued - February 2003 onwards