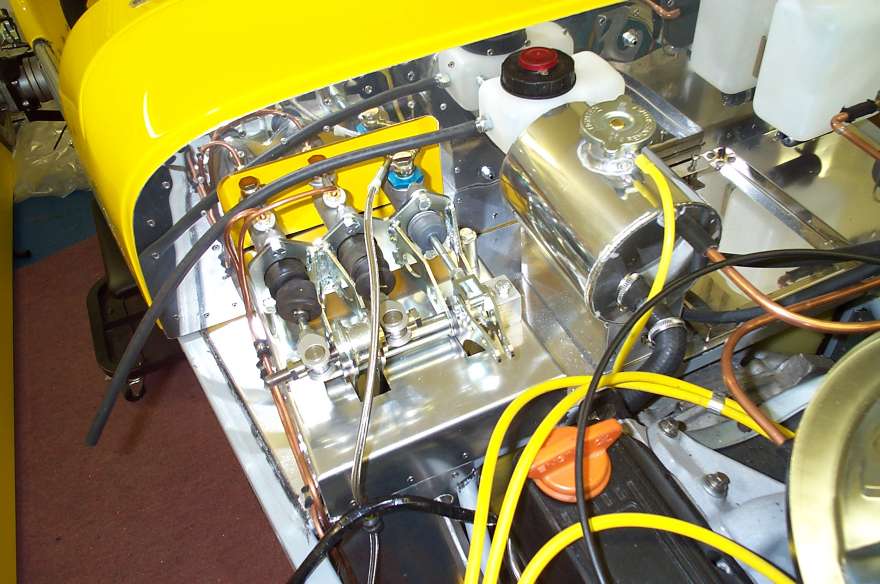
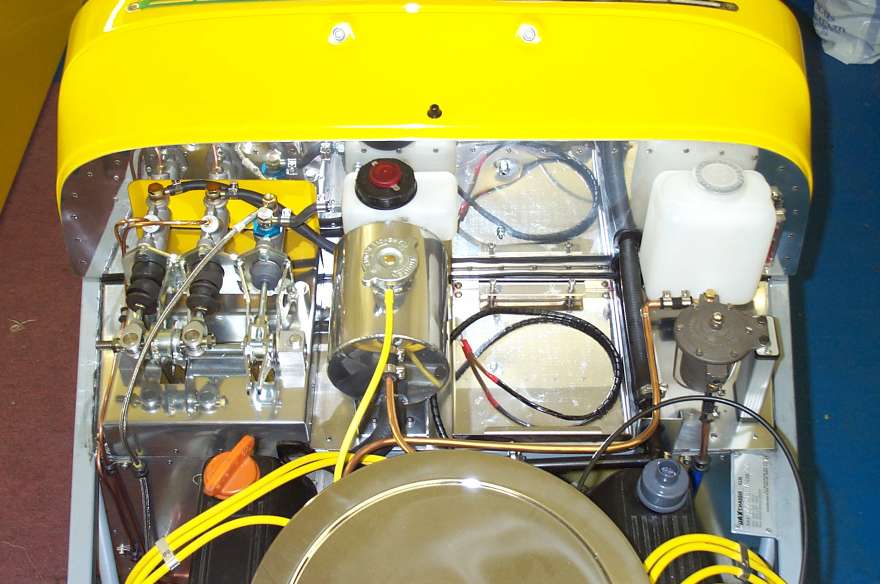
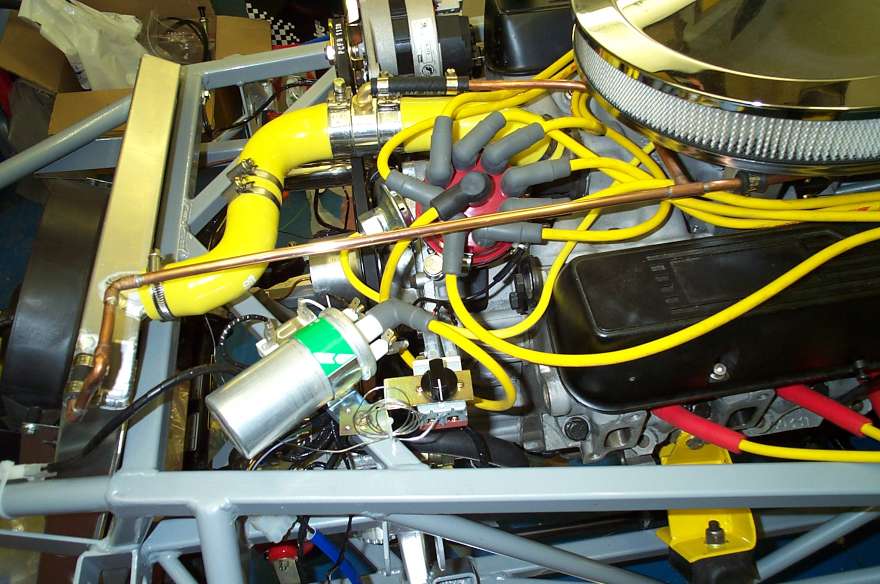
Pipe work this week, the feed and return pipes for the remote filter were cut to the correct length and a clamp made up to hold the two pipes together as neatly as possible, all looks good but can’t tell for sure until the engine is working, must remember to buy some clamps for the hoses before I start the engine. Next was the vent pipe for the cooling system, this should help stop air locks (I hope!) in the top hose, so with some 8mm copper pipe left over from the fuel feed and some elbows and a “T” piece a pipe was fabricated that slopes from the radiator to the header tank, I can’t connect the top hose vent to it yet as the hoses have not arrived. Just to brighten things up I cut a piece of the yellow silicone small bore pipe I had left over from the distributor vacuum advance for the header tank overflow. I am using Dax’s metal bottom hose that has an outlet for the heater return in, this keeps the pipe lower down and more out of the way from the crowded top of the engine and I can’t easily run a pipe under the inlet manifold as I am using the very low Offenhauser manifold. So while I was playing with copper pipe I bent a piece of 15mm pipe for the first section of the return pipe that sits on the lower chassis rail, I haven’t decided where the heater pipes should enter through the scuttle panel yet so I can’t finish the pipes off, I will have to get the battery tray and washer bottle and see where the space is left.
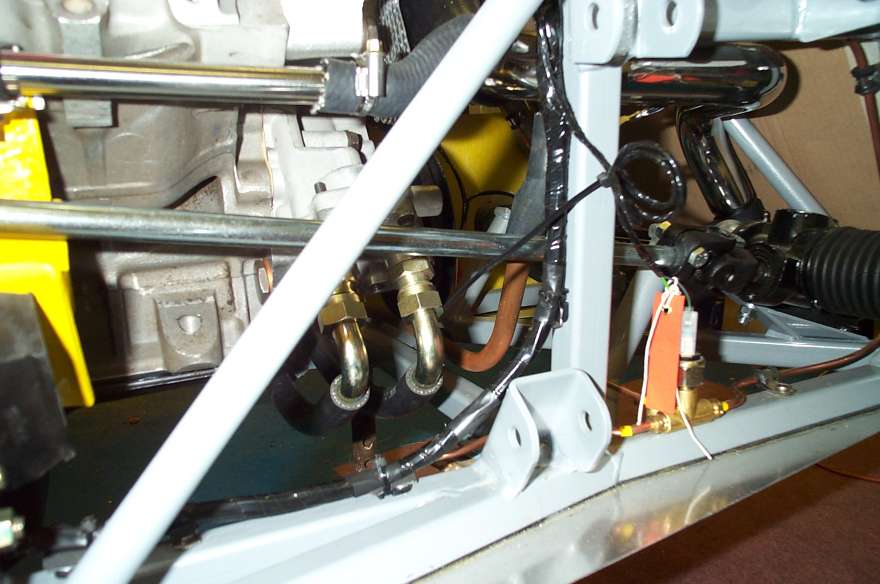
Visited Dax this week and picked up a batter tray and washer bottle, managed to get them fitted during the week. Saw the pictures of the new Rush MC Kawasaki with a great looking air scoop on the top of the bonnet, I just have to get one of these so I phoned Simon at Dax, looks like it will be a few weeks before they have the mould ready so I will have to be patient. With the help of a small box from Maplins I fitted the fuel filter, now I can see what space is left (if any) to allow the water wipes to get to the heater. While I was thinking about the heater pipes I started to make the fuel feed pipe from the filter to the carb, I have ordered the banjo fuel connection for the Edelbrock carb from “Real Steel” as there is no space with the original fitting to connect the fuel pipe to the carb under the 2” air filter I am using, and it points to the side of the car rather than the rear. The banjo fitting should cure both these problems (I hope!)
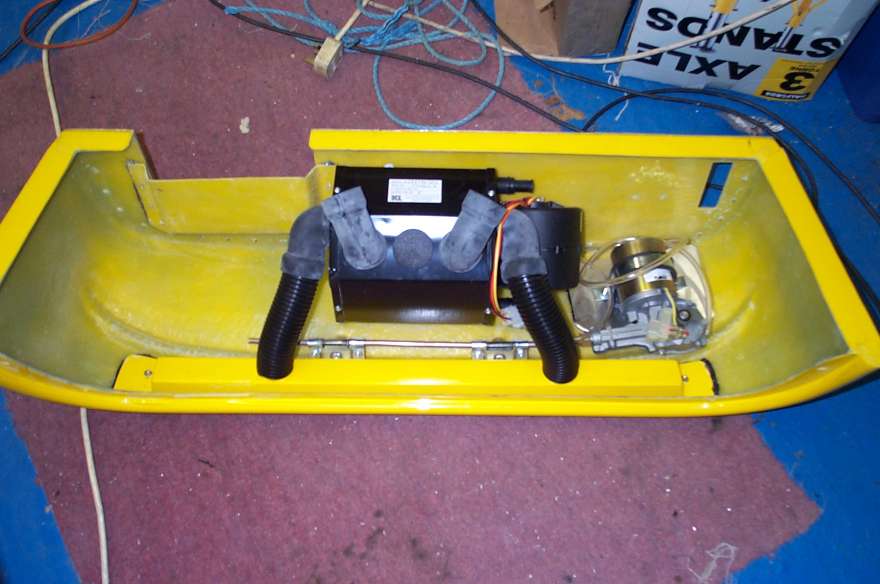
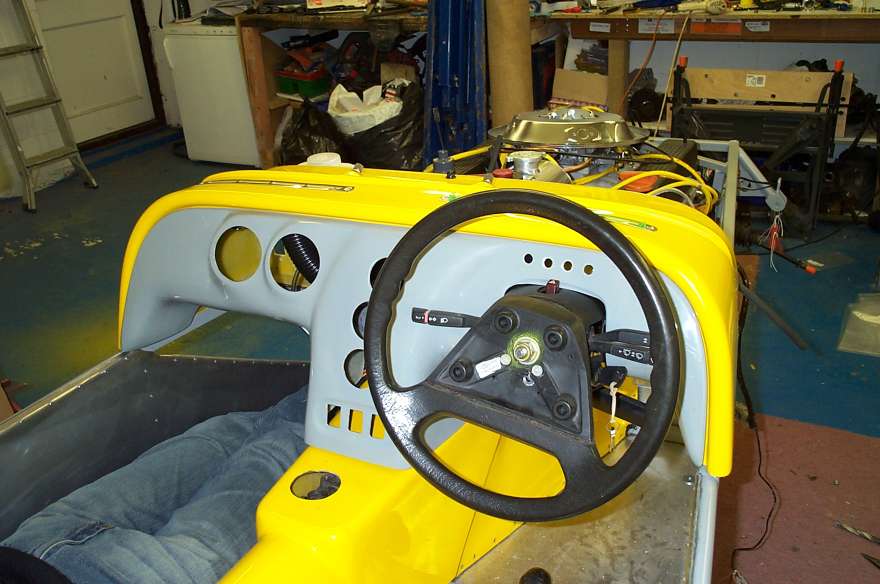
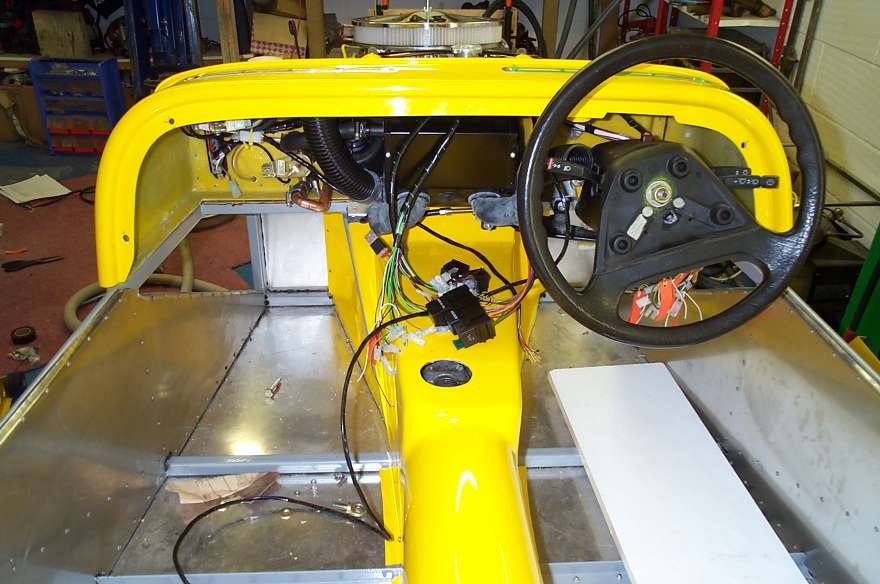
Another visit to Dax this week produced the clutch master cylinder kit, wiper motor, dash board and the SVA bars. The clutch master fitted easily but required a small amount of “adjusting” to the pedal where the yoke fits into it so that it moved freely. The wiper mechanism was assembled first to make sure the holes were made in the correct place and the tube between the wheel box and wiper motor required a small bend so the wiper motor cleared the air distribution duct for the demisters. The wheel boxes were tight against it though. With the holes carefully cut in the scuttle the wipers were assembled, the locating plate for the wiper motor and the air distribution duct were stuck into place with Wurth and left to dry overnight. The dash board required some small amount of trimming to fit well, and then this was trial fitted to check the alignment of the steering column. This showed that the steering wheel required going back a few millimeters so the switches cleared the dash, and a couple of millimeters to the centre. This was much better than I could hope for and the small adjustments were easily made. Then it was time to tackle a job I had been putting off for some time, the ali piece for the foreword part of the scuttle that is under the bonnet needed careful trimming to fit. As it turned this was not as hard as I expected, and with a bit of help from a jig saw and a lot of help from a file was fitting quite well. My son gave me a hand riveting this in place, we both agreed we not going to use as many rivets as Dax used in their demonstrator. This meant the heater could be fitted for hopefully the last time, the washer jet was fitted first and despite having 5mm more clearance the suggested in the manual between the underside of the scuttle and the heater the washer tubing has quite a sharp bend in it, still it does not seem blocked so I will have to see how it works.
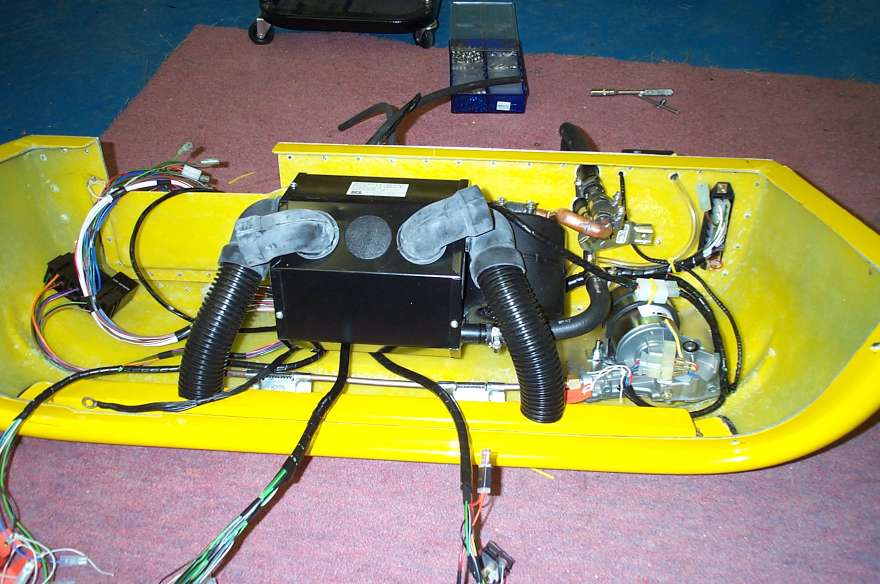
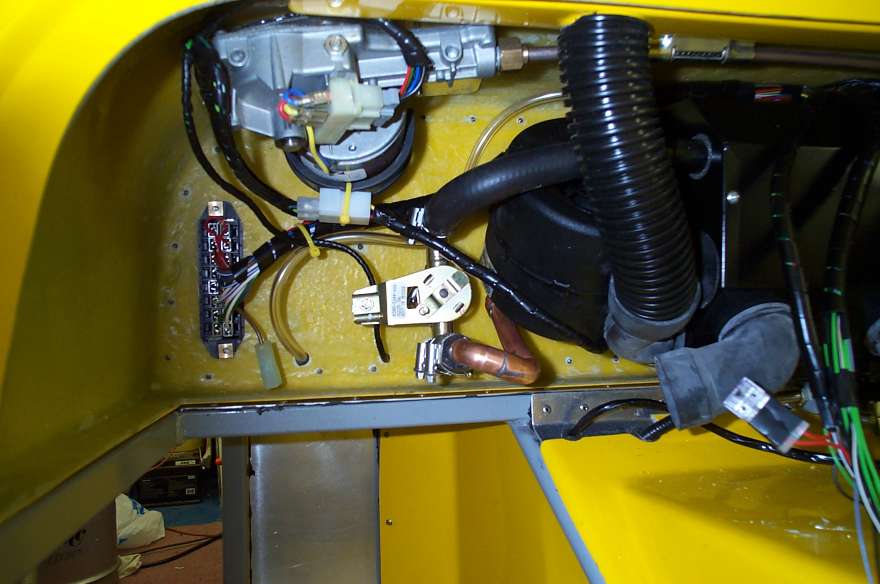
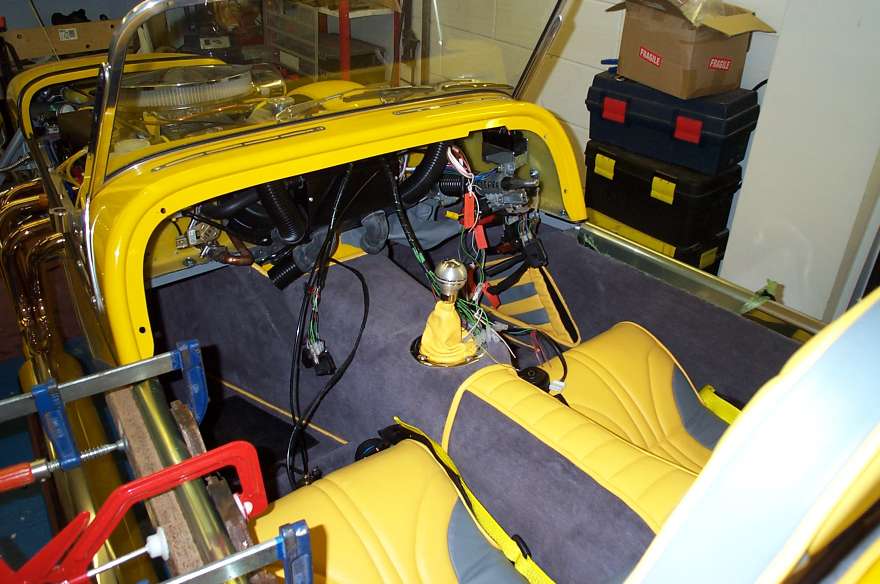
Time to get on with some more of the harder jobs I had been putting of, I had not been sure if it was worth fitting the heater valve as I could not see were to fit it. But as I looked under the scuttle I saw a place it could be fitted, only problem was that I would never find a hose the right shape to connect it to the heater matrix, still I had some odds and ends of copper pipe lying around so I had a go at making something to do the job. It did not take much to make something so I have decided to give it a go and see if it works in the real world. Next task was to overcome my fear of wires and see how the centre harness might fit. I had decided to use the harness from Dax as I did not want to spend hours making something up, and it comes with all the relays, switches, warning lamps, fuse box and the connectors to connect the front and rear harness to. Having labeled it up one night when it was too cold to work in the garage it was quite easy to work out how it had to go, some spiral wrap was used to keep wires going to the same place together. From my newly acquired collection of grommets I found some suitable ones for heater pipes, windscreen washer tube and power cable for the washer pump and with great trepidation the holes were cut for the heater pipes with a hole cutter, luckily they seem to have worked out fine despite my visions of me wrecking my nice shinny piece of ally. I have not worked out where to attach the relays to yet but am sure that a small piece of alloy and some Wurth will overcome the problem.
My wife had bought me a nice new tub of Vaseline so I decided to have a go at packing the oil pump before I put the cover on it, time will tell if I have done it right, but I understand that you can use the remote oil filter hoses to get some oil into the pump to help it to prime.
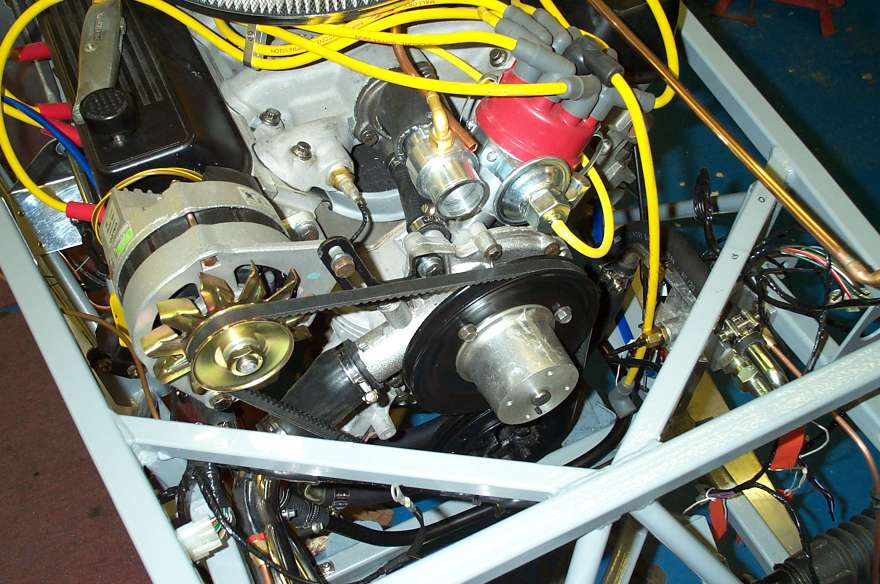
I had managed to pick up an alternator during the week and managed to fit that ok, but the fan belt was too short so that will have to be sorted out next week. Think I will have to find a book to see how to wire it all up!
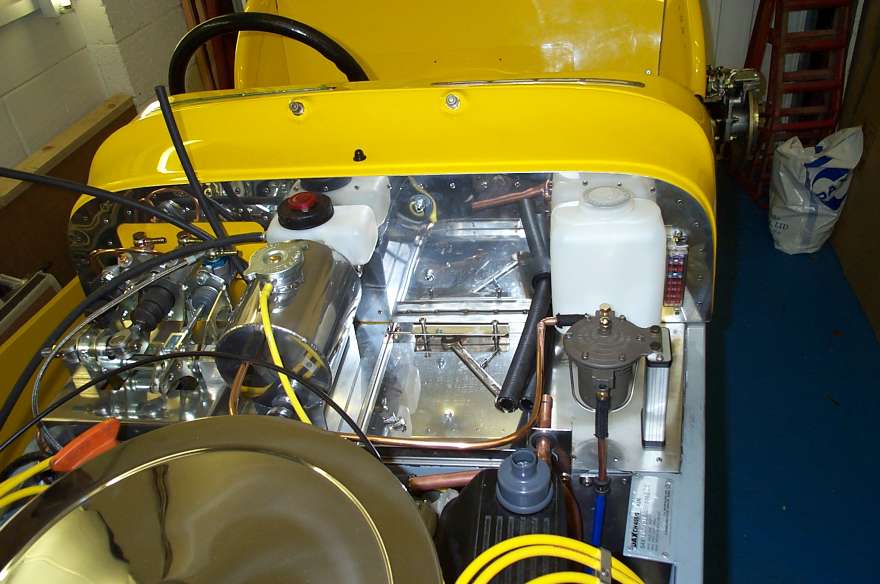
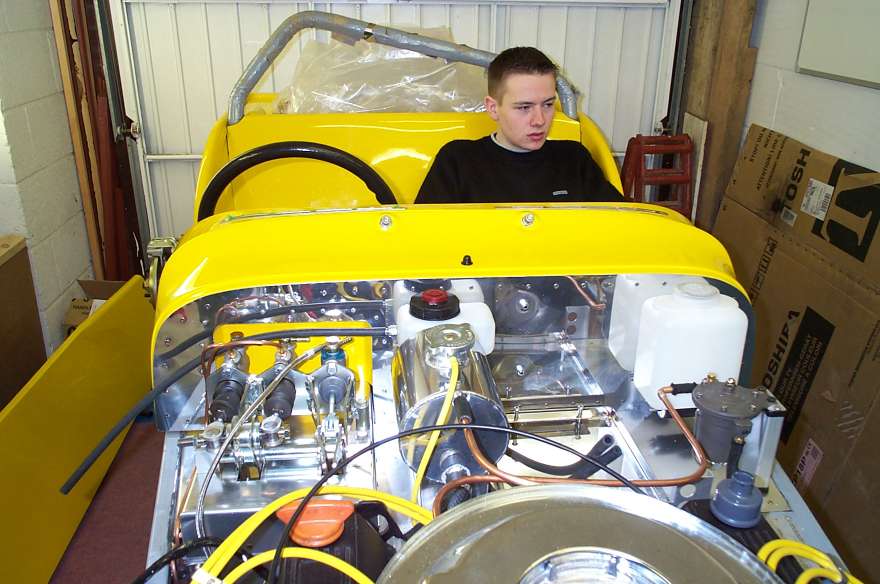
The third attempt at finding an alternator belt was successful and the alternator bolted into place. The instruments I ordered from Merlin Motor sport came this week, I ordered from them because they supplied my remote oil filter kit with new pump cover and should know the thread sizes are required (and their prices seem quite reasonable). This worked as well as I hoped and the 20 lbs per square inch pressure switch, temperature transmitter and connection for the pressure gauge fitted correctly, that’s three more holes filled up! Now to have a look at some wiring, I had put off for months the decision on where to take the front harness through to the cockpit, I finally decide to the left of the clutch pedal as high as I could get it, the hole was cut and after a lot of pain (scraped hands it restricted space) the harness was threaded through with the pipe for the oil pressure gauge. The ends were then put on the harness, no changing of mind now as the harness can’t get through the hole with its plugs in place! The Dax harness has a plug either side of the car at the front, they are identical and you just connect things like water temperature transmitter, oil pressure switch, alternator and starter solenoid to the plug nearest. This worked very well and it did not take long get most things connected, still not sure if more than the 2 connections to the alternator as shown in the wiring instructions are needed, or how to wire up the distributor, may have to get some help here. While I was connecting things the reverse light switch wires were repaired and connect to the rear harness (after checking to make sure the switch worked). The route for the main power cable to from the battery to the harness was worked out so that it was kept out of sight as much as possible, and some spiral wrap wound around it for extra protection. The main fixing holes in the scuttle were drilled, then marked on the chassis and drilled. The scuttle was refitted but the bolts not tightened down as the side panel have to be fitted yet. Time to trim the supply pipes for the master cylinders and connect them before I called it a day.
9th March
Dax still have not made the exhaust, this was ordered nearly 2 months ago, still they recon it should be about 10 days away, Demon Tweeks still have not delivered the 3 bits of hose I need to make up the top hose, they were ordered at the end of January, So no chance of starting the engine yet. Decided to fit the windscreen and hope I can lift the scuttle enough to fit the side panels at a later date. The brackets that hold the mirrors to the windscreen pillar have 2 threaded holes in to attach them with, during the process of manufacture they had become rust, but I did not realise how badly, after trying for 15 minutes with the screw to ease them a bit I realised I was getting nowhere fast, luckily I had a tap the right size and that proved more effective, but it still took me an hour and a half to drill the four holes and attach the brackets. The windscreen was fitted quite easily but I attached the pillars to the windscreen after it was in place as this meant I did not have to slide the pillars down the scuttle (as the build manual suggests) with the probability of scratching the scuttle. With the aid of someone holding the windscreen in the correct position the holes were drilled through the scuttle to fix it in place. I could not resist trying the wipers to see if they worked, but in normal Dax fashion the arms need “adjusting” to fit as they were too long. That done it was time to connect some wires, the Dax wiring harness tells you what wires to connect to the Sierra stalks. The battery from the donor car was used with a 30 amp fuse in place to protect the wiring in case of a problem. Amazingly it all worked, the washer pump was connected the wrong way round but that was soon put right. The heater fan worked and the light on the switch came on when the lights were turned on. While I appeared to be on a roll I dug out the fuel gauge and tried that, but that registered full, I know other people had had this problem and it required the float on the fuel gauge to be bent so it worked “the other way round” (see Tim Hoverd’s build diary). With this done it then worked fine, only four more to get working! The horns were fitted and they also worked ok. Next I thought I better get on with one of the jobs I had been putting off, time to connect the fuel tank to the fuel filler, I had a lot of fun trying to connect the vent from the tank to the fuel filler, the pipe on the tank was too long and I did not fancy cutting it shorter as some swarf would get into the fuel tank and I was not sure I could remove it all. In the end I found a hose with a right angle bend in it that did not kink when fitted. The main feed pipe was fitted after trimming and fitting the small vent.
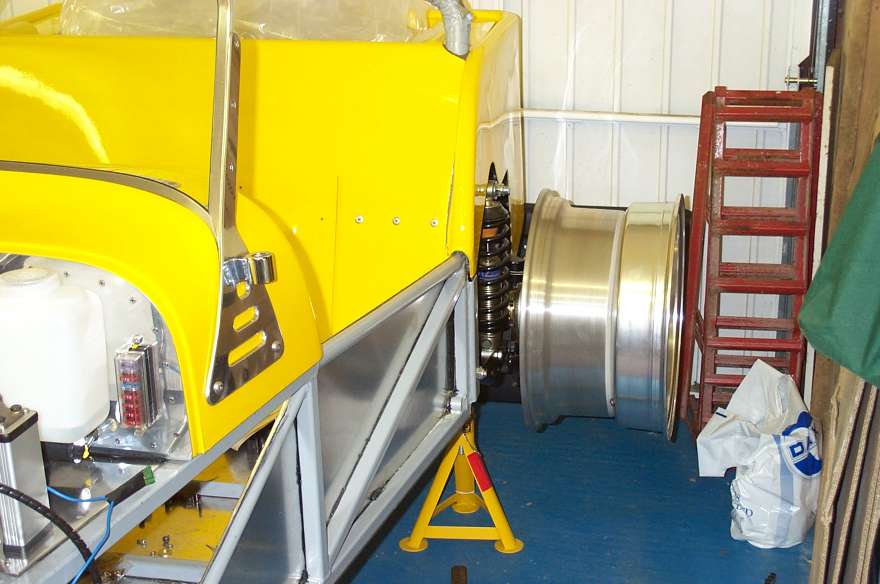
I had found the wheel studs to be a bit short so I have got some longer ones from Burton Power, trouble is they are too long, so I tried one on my rims and worked out how long they had to be and with the aid of a hacksaw “adjusted” them to the correct length, well one wheel was done, still got another three to do.
16th March
![]()
23rd March
30th March
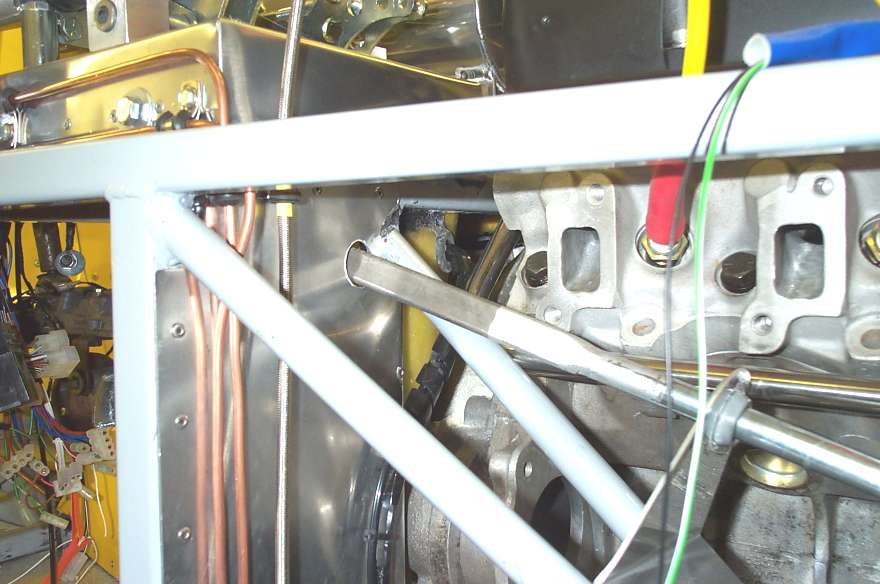
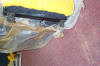
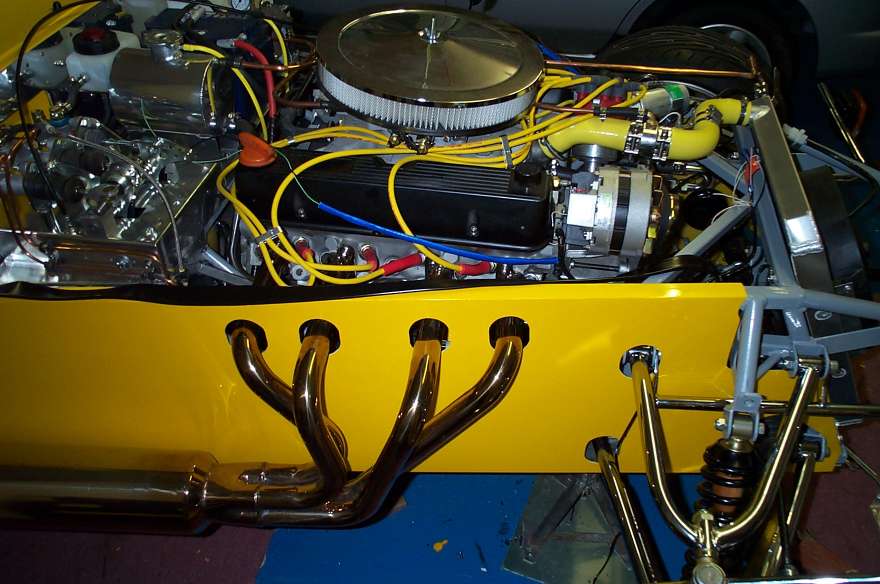
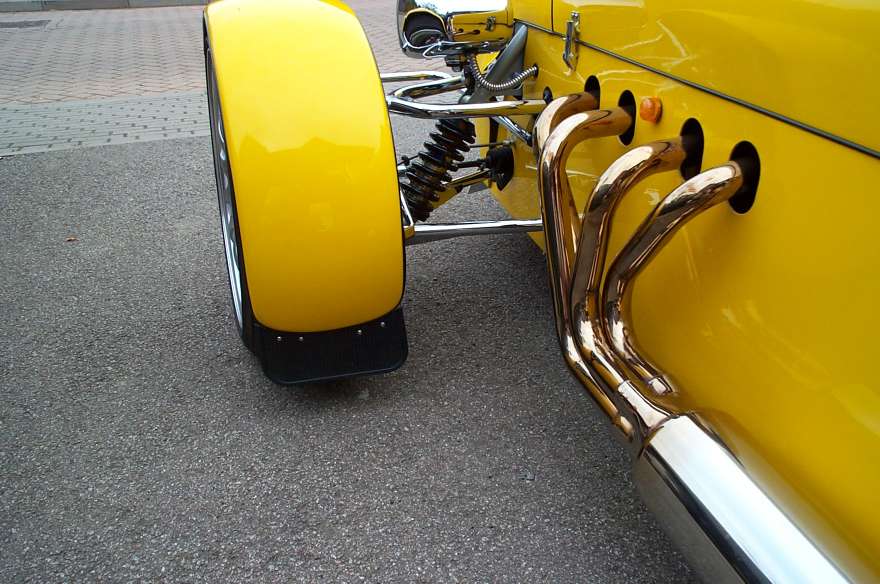
The exhaust is finally ready for collection! I managed to get out one lunchtime and collect it. It does look great, but weather it is worth what DJ charge for it is another matter. Still they fitted reasonably easily, not sure about the strengtheners that DJ supply, they are really not big enough but will have to do for the moment. Once everything is fitted I started the engine up again, what a great noise, my son stood there for 15 minutes with his draw dropped, and when he finally speaks it is to insist I take him to work in it ever Saturday. Once the exhausts had cooled down I made a template out of wood to enable me to mark the positions of the exhaust on the inside of the side panel. Once made the exhaust was removed, and the side panel fitted after the template had been taped into the correct position. The position of the pipes were marked using a sharp pencil. The side panel was then removed and the centre of each pipe calculated from the marks showing the top and sides of the exhaust, a very small drill was used to transfer the position to the other side and after masking tape had been applied to protect the side panel, the position of the holes were marked. These were drilled using a hole cutter. The holes were offset a little to allow for the flanges to go through. But with hindsight I think the hole could have done with being a bit bigger, it was hard to get the manifold through the holes and the pipes are very close to one side of the holes, I may have to use some flange finishers to make the holes central. The side panel was refitted and the exhaust fitted, I used some grease on the threads of the manifold bolts because there is a tendency for the stainless steel of the bolts to stick to the alloy of the cylinder head which stops the bolts being tightened properly and could lead to the stripping of the threads in the cylinder heads. DJ supplied some Fire Gum which was used on the gaskets to make an exhaust tight seal.


6th April
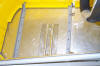
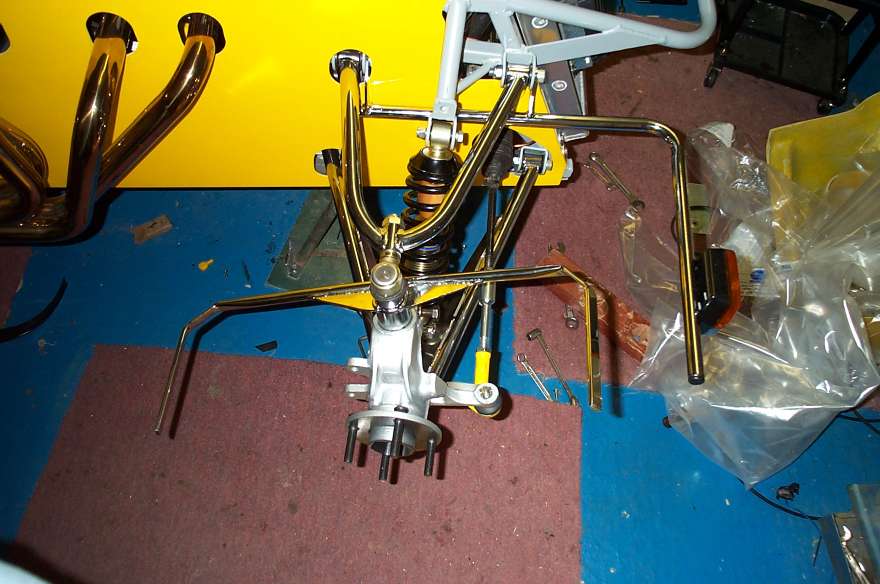
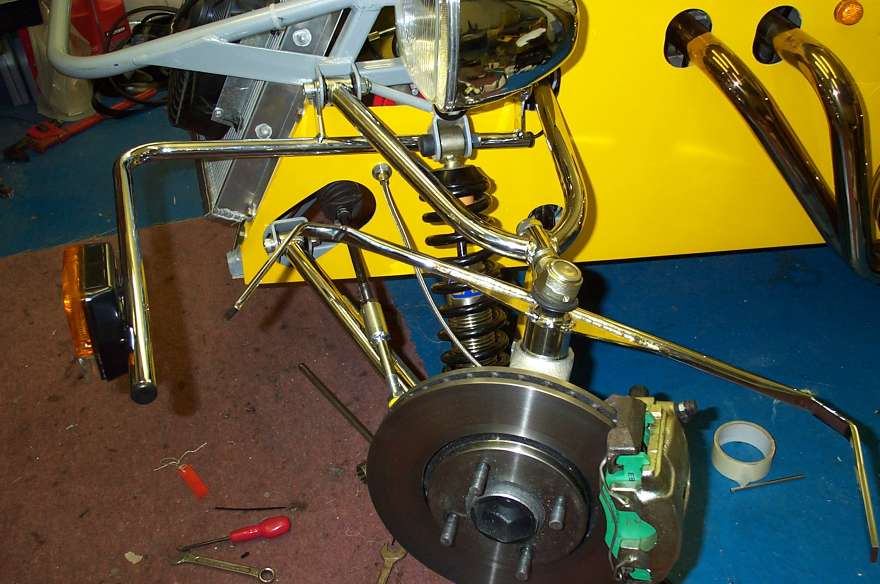
With the exhaust in place I could look at fixing the side panels to the underside of car, there had been various methods described during discussions on the “List”, I have decided to use some 5mm dome headed screws locating into rivnuts that take the place of rivet in the relevant place, to bridge the gap between the bottom of the side panel and the chassis a short length of 8mm copper was used so the screw had something to push against. This appears to have located the bottom of the side panel adequately especially if Wurth is used to fill the gap. Next task was the throttle pedal, I had been putting this off for months but this has to be done before the right hand side panel is fitted, the hole drilled for the cable to run through beside the brake pedal at hopefully the right place to get enough pedal travel to achieve full throttle. The hole was drilled in the pedal and a solder less nipple used to clamp the cable, I used some locktight on this as I fear that access will be very difficult once the side panel is on and I don’t want the cable coming loose. This all appeared to go remarkably well and I can get the throttle fully open. Next I decided to fit the front suspension on the side that the side panel was fitted, this was in case there were any problems that need to be sorted out. I managed to get the top wishbone upside down, but this was apparent when I tried to fit upright and luckily I had not put a nut on the bolt behind the side panel which is a real pain to fit and tighten up. Eventually it was all fitted and tightened up, the car is looking a lot wider at the front now!
Then on Friday I found all my trim bits were ready, a quick trip to Dax left my credit card wincing but the car full of high back seats, carpets, dash board, doors and the tub cover. While I was there Peter very kindly spent some time showing me how to fill in all the relevant forms.
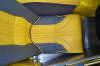
The weekend was spent playing around with the various bits seeing how they fitted together, while the drivers side panel was off I fitted the inner foot well carpets, that was difficult enough with some access, I am not looking foreword to doing the other side! I made a couple of “L” shaped brackets for the front of the seats and fitted bolts in the front cross member to attach them to, the holes were drilled in the rear cross member and the seat fitted (wish it was as easy as that!) The seat was fitted and I had a chance to see if the driving position was going to be alright (not sure what I could do at this stage if was not!). Luckily it all seems fine, the high back seats are as comfortable as I hoped and as far as I can tell at this stage the driving position feels very good.
I realised after looking at some pictures that I had still managed to get the top wishbone the wrong way round! The one time I should have checked in the manual and I didn’t. Nothing for it but to remove it and fit the correct one, this seems to be a trap a few people fall in, trouble is that when it is fitted correctly it appears to be very close to the damper on one side. (Enough excuses) Next was the right hand side panel, the panel was much easier to fit the left hand one. The position of the exhaust holes were marked in the same way as for the left hand panel, then the holes cut and the panel refitted. The exhaust was then replaced with plenty of sealer round the gaskets and the manifold bolts greased so they tightened up easily.
I thought that fitting the driver’s side suspension would be easier but had forgotten about the steering column, the side panel was still loose to help give me a bit better access, but it still took a long time to do up the top wishbone bolts, but at least I can’t get the wishbone round the wrong way this time. The steering rack was connected to the hubs, I made sure that the extensions and the track rod ends were screwed on the same amount each side and roughly set the tracking (very roughly as it turned out). A hole had been drilled in the SVA bars where the light fixed so the power cable could run inside the bar out of harms way, so while I was working in the area I thought I might as well fit the lamps, a nice easy job to finish the week off with!
I planed to do the steering geometry on Saturday so set about sorting the front wheel studs out (there were too long and had to be cut down a bit), cutting hard wheel studs with a blunt hacksaw soon became boring, and as I had a flash of inspiration on how to fix the relays under the scuttle they were temporarily left. A crude box from spare aluminum sheet was made and lined with some foam so that the relays could be placed out of harms way, but easily removed if there was a problem, while the Wurth was out the silencer supports were also stuck down.
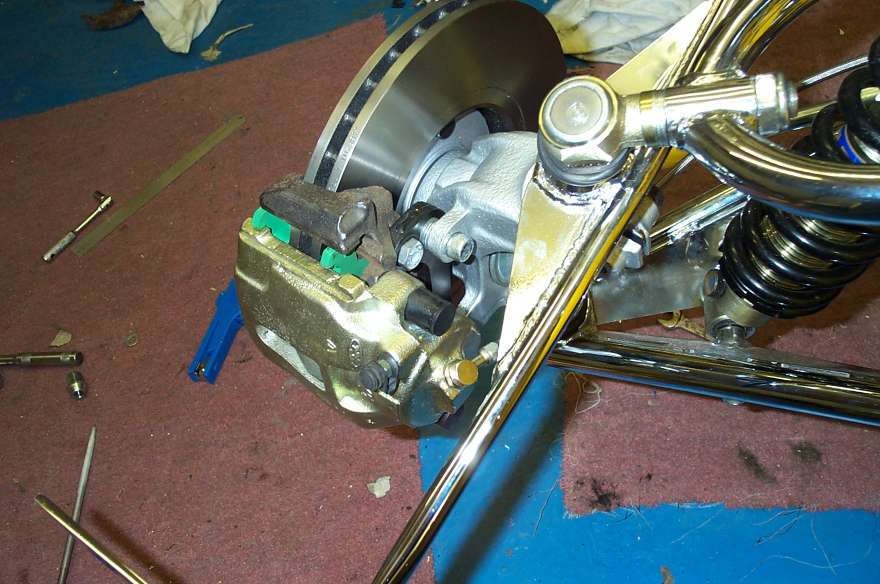
Friday was Dax’s open day, Bill had offered me a lift there in his Rush and the forecast was for sun, and for once the forecasters had got it right, the weather was great, and we met up with some other Rushes on the way, we arrived at Harlow in time to find a parking space. Dax must have had a good day as attendance was excellent. There were many good cars there and was able to put some faces to names. I managed to find Trevor Turner (It would have been hard to miss his light green Rush), who had offered me a set of non ABS caliper carriers that I needed to make the Dax brake upgrade work with my calipers from a ABS equipped car.
A friend came round Saturday afternoon to help set up the steering geometry, the wheels were put on, and the car left the garage for the first time The front wheels were screeching in protest as the tracking was a long way out, a small tidy up in the garage and the car pushed back. I had borrowed some tracking gauges from work and the track was soon set correctly. But the camber was another matter, we could not get any consistent results as we removed and replaced the shims. After lot of messing about and changing of shims we realised that if the steering was not set exactly straight then the camber measurement changed, this is probably obvious in hindsight, but at the time we had not realised how much the steering had moved as we changed the shims or how much a very small amount of steering lock changes the reading. Still it was eventually sorted and the car was much easier to push.
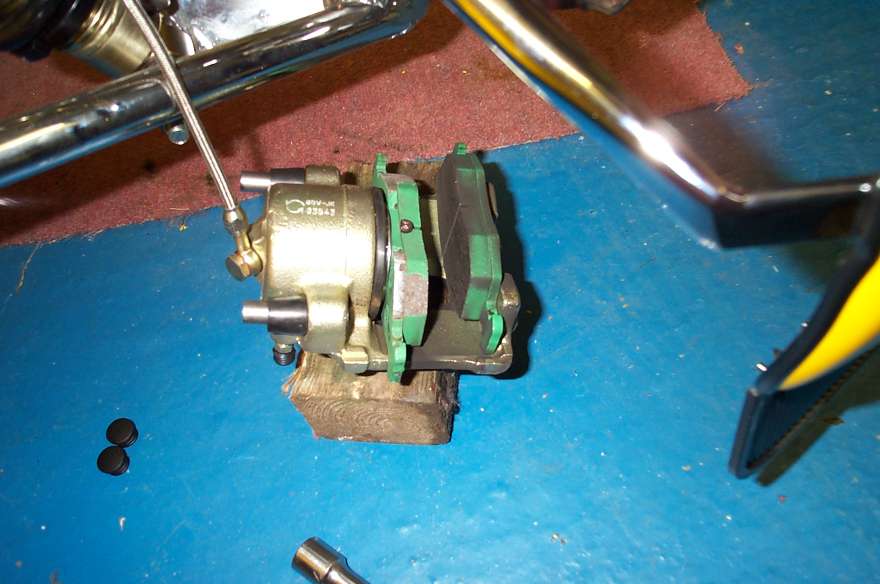
Time to play with the front brakes, the caliper carriers have to filed out a little to accommodate the larger 278mm front discs, this took a very long time as I did not want to take too much off, each time it was fitted it appeared to only require a tiny amount more to be filed away, this went on for more time than I care to remember but eventually it was ok. Next a small amount has to be removed from the inner brake pad as it fouled the smaller (no ABS carrier). Some 6 hours later one side was completed, as is usual the second side took much less time, so only 2 hours later all was finished!
Monday saw the car back outside to drain some water from the cooling system so I could refill with antifreeze, it took a few squeezes of hoses and then the engine running to get rid of an air lock. I had also decided that I have got the brake master cylinders the wrong way round (I had the small one on the front brakes, and it seems that people with the same set up as me have the bigger cylinder on the front), this means taking the pedal box off which is now a two person job, lets hope this works ok. At least it is not too messy as I have not got any fluid in the brake or clutch system yet. After all this I decided to try and fit a headlamp and flasher repeater lamp which would have the front of one side of the car nearly finished. After I had wired the headlamp up I could not understand why the dip lamp was no where near as bright as the main beam, luckily my son, who has a much better understanding of electrics than I, was there, and instantly worked out that I had got the earth and the dipped wire the wrong way round, he was of course right so I swooped them around in the headlamp plug and all was fine. The indicators were not working at all thought, but this was one I could sort out my self, I had seen some corrosion in the switch so this was dismantled and cleaned. Now I hate taking things like this apart because it is full of springs that fly every where and you can’t work out how to refit them, but luck was on my side and nothing flew away, the badly corroded contacts were cleaned up and after three attempts the switch was reassembled, and even better it all worked!
Just got my date though for the SVA test, 12 May, seems very close think I will start to panic, clutch and brakes have not been filled with fluid or tested yet and there is still plenty of body panels to fit, never mind the dash board and fitting the interior.
28th April
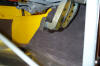
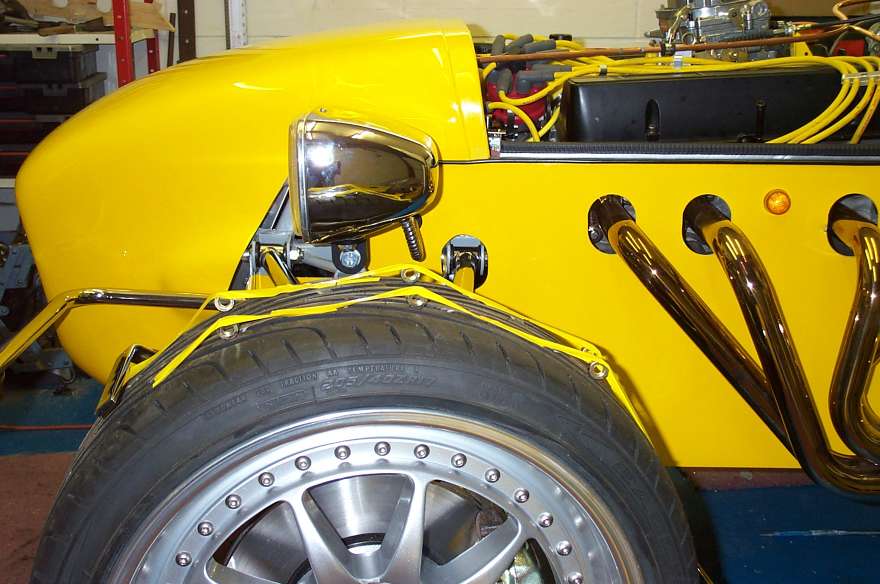
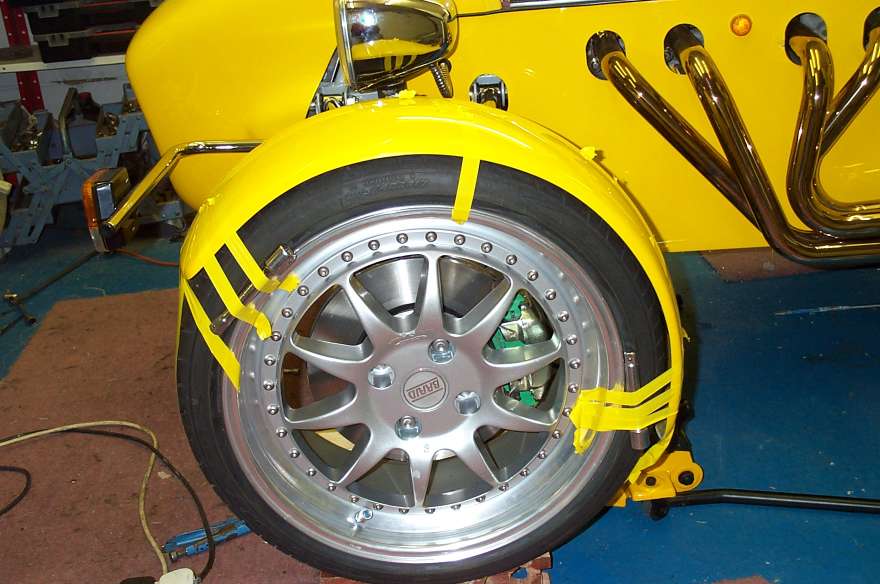
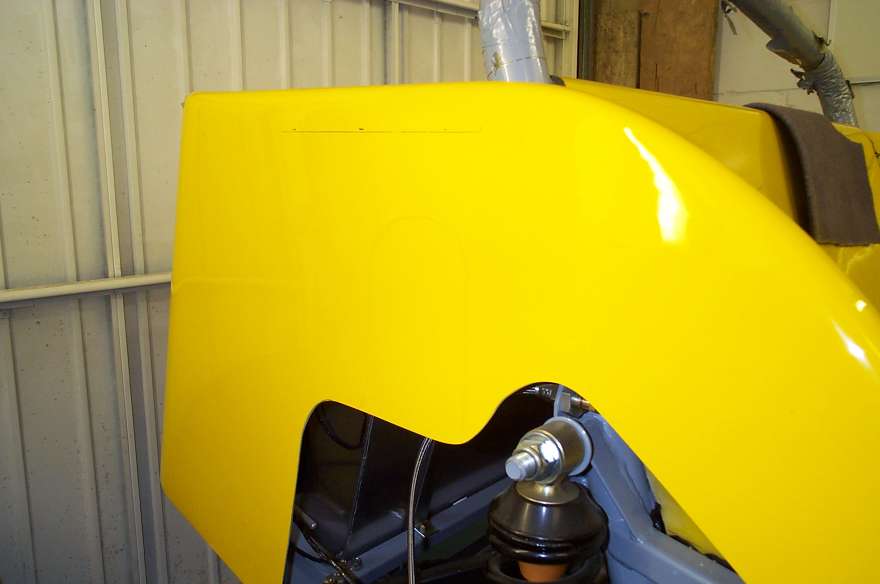
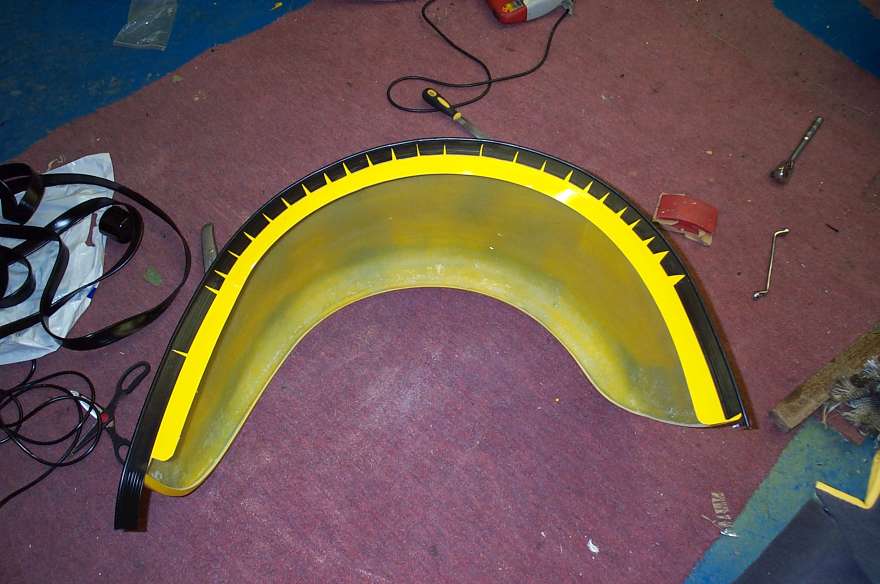
During the week I got the front brake hoses fitted and the off side headlamp and repeater lamp fitted and connect so I was ready to fit the nose cone, this was fitted as far back as I could get it which meant that the front bolt heads for the upper wishbone were just about covered. Now the moment of truth, the bonnet was taken out of the shed where it had been stored out of harms way and a hole just big enough for the carb was cut so I could trial fit it. The fit seemed ok, a small gap front and rear of the bonnet, but I had not fitted the rubber seal and this would take up some space. The nose cone was bolted in place, I have only used one bolt at each side in the flange as they are very difficult to get too, I had to remove the alternator to fit the off side, and was worried if I would be able to refit it with the nose in place but was just able to do it with a few grazed knuckles Front mudguards were tackled next, the manual suggests that some nuts are used to space the mudguard away from the tyre between the tyres, these were duly taped into position, the stays attacked with the angle grinder to remove the chrome plating and mudguards roughed up with the corner of a file. Black Death was applied to the stays and the mudguards put into place and held with lots of strips of insulation and left till the morning.
In the morning the tape was removed, the wheel taken off and more Black Death applied to fill the gaps and encase the stays. This seemed to work quite well and the other side was done in the evening. The came round on Sunday so I roped him into giving me a hand bleeding the brakes and clutch, the clutch bleed fine although I had to remove the slave cylinder and hold it in a vertical position with the bleed nipple at the top to get all the air out. The brakes however were a lot more fun, despite my note on the white board to remind me to tighten up the hose to the rear calipers, I forgot, so there was brake fluid all over the floor! Every hose to caliper connection proved difficult to seal. With hindsight I should have assembled them with brake fluid as a lubricant and they would have tightened up much better. Also one of the master cylinder connections proved to be very difficult to get sealed. After some hours everything was working fine and my front mounted brake switch had not caused a problem.
I had taken Monday off work so the day was spent fitting the rear mudguards, I first stuck the beading round the rear wheel arch as I felt that I would not easily be able to fit as I attached it and it would protect the tub from damage as I trial; fitted it. The front couple of bolts were attached to the chassis, the rest were bolted through the tub with large “penny” washers each side. I set the rear wheel arches 30mm down from the top of the tub rather than the 35mm it says in the build manual as many people seem to have had problems with tyres rubbing, and I set them as far foreword as they could go. (500 miles later this seems fine and I have not had any problems with them).
5th May
Time now to finish the cockpit area, I am not sure how much of this I remember as I was high on the fumes from the “evo stick” most of the time, most of the carpet was quite trying to fit, the manual as usual had got the wrong pictures of the carpet! I stuck down any carpet I thought I would not have to remove like the sides, rear floor and top half of the rear bulkheads, the rest were attached with Velcro. The gear leaver was cut as short as I could make it. The right angle brackets made for the passenger seat made up, these were quite tricky as the seat wanted to be as low as I could get it at the front so the back was at the angle of the rear bulkhead. In the end it fitted better than the driver’s ones so a few adjustment were made to that as well. Sunday was a day off as it was the kit car show at Stoneleigh. I met up with Huw who very kindly let me have his bonnet catch covers for the SVA. There were many Rushes at the show and it was good to meet up with a few people and see how the finished car should look.
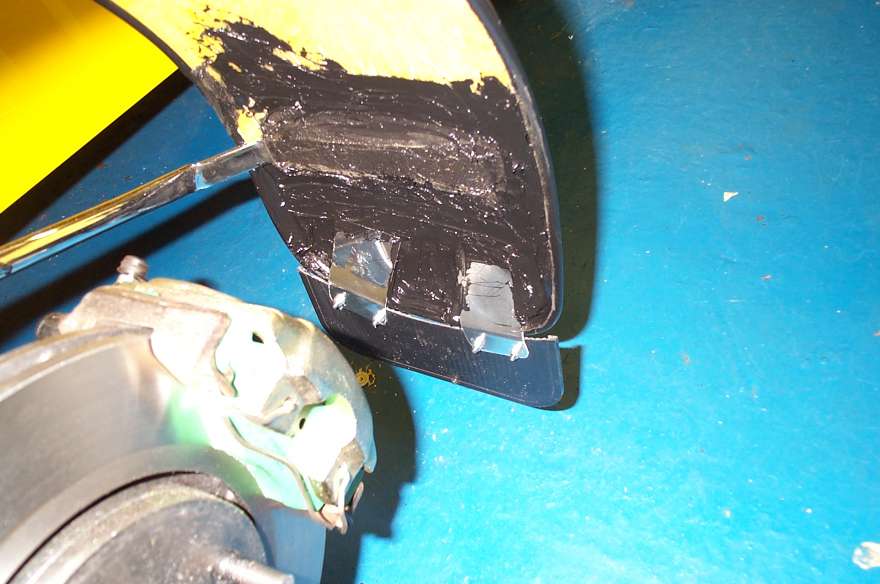
Monday was a bank holiday so I had another day to work on the car. The target today was to see if the car would drive, so despite no bonnet a quick trip down the road and back was taken, we only got to third gear but things seemed to work so I would stand a good chance of making to the SVA test next Monday. The overriding impression of the very short drive was of stones flying everywhere, so to protect things a bit, some front mud flaps would be required. I also noticed that the front caliper carriers were catching the discs very slightly so would require some adjustment. The mud flaps were made buy sticking 2 strips of aluminum with Wurth to the bottom of the front mug guards and them cutting down the cheapest set of mud flaps from Halfords to fit and bolting them on with 4 bolts.
11th May
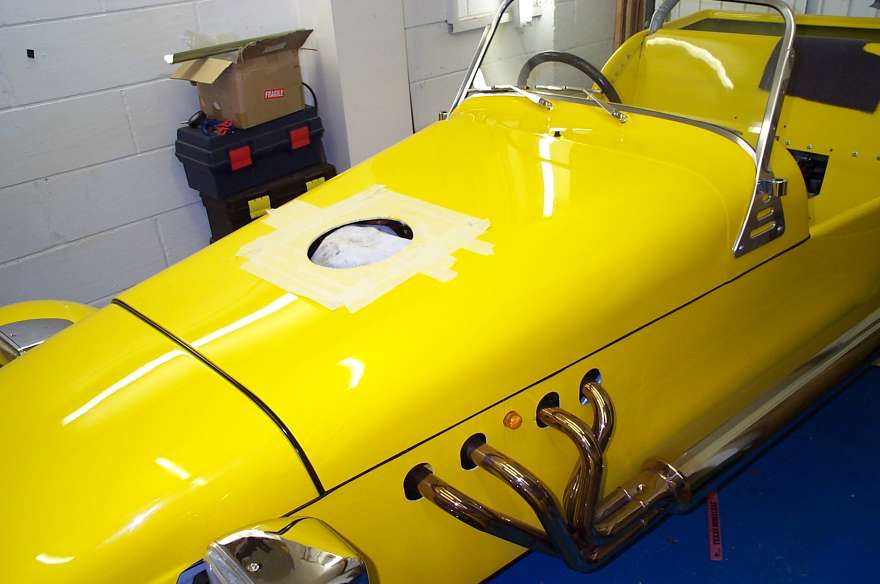
The target this week was to get the car in a condition that would enable me to drive to work to bed things in a bit, and get an MOT. The bonnet was fitted, this was just a bit fiddly attaching the hinges, once it was fitted the hole was marked for the air filter and duly cut with a jig saw, I had made it a bit small so I had to go round again to make it a bit bigger, better that way than to have made it too big I suppose. I had to go on a training course on Thursday which messed my plans up a bit, it also meant that I would have to go into work and borrow a set of trade plates to bring the car in. The car made the 28 miles to work without problem, but then the boss decided to call a meeting because I had been away the day before when the meeting was originally planed! No chance of a MOT today then, but the car got me home ok and I still had the trade plates for brake testing on Saturday. My son was had a day off work so we went to the local industrial estate which was deserted at the weekend and preceded to try and set up the balance bar, we could not get the nearside front wheel to lock up despite smoke coming off the off side one, time to check things over back home! Now last time I played around with brakes sliding calipers were not in general use, what I found was that I had not cleaned up properly the caliper carrier that the brake pad rests on, which caused it to stick. This was duly cleaned up, the brakes now worked correctly, and the correct position on the balance bar found with the fronts locking up just before the rear. But most of the day had been taken up with sorting the brakes out. Not much time left to get rid of any sharp edges and fit the SVA specific parts like bonnet catch covers, extra bar in the nose cone and all the bolt covers.
SVA Test
I had to be at the test centre in Leighton Buzzard by 8am Monday morning, so I left the house at 7am to give me plenty of time to fill up the fuel tank and allow for any traffic problems. It had been raining during the nigh and the roads were very wet and there was still some drizzle in the air. I found my old sailing hat and put my jacket on as well as a jumper as it was also not very warm. The car behaved fine on the wet roads and I arrived at the test centre in plenty of time after filling up the fuel tank. A few minutes later a Caterham 7 arrived behind me. I found out it had only taken him about 50 hours to assemble his car, I recon it took me around 500 hours to build mine, he also said that it cost about £100 less than £20k to buy.
Just after 8am the place opened up and Duncan introduced himself as my tester. Well I am sure there are plenty of accounts of what they do in the test but what I found hard was that I never knew if had found something wrong! He would push and tug various things, get bits of measuring kit out, write notes on his pad but did not give much away! After about 3 nerve racking hours he took it for a little drive round the test centre, by this time I noticed the pedal pads had fallen off! I had meant to stick them down but forgot. He did comment that he was impressed with the front mud flaps and that it was the first time he had driven one and not wished he was wearing a crash helmet. Then it was time to see what problems he found, 2 minor concerns, the off side part of the nose cone that covers the top front wishbone mounting was not covering it as much as it should – this was sorted by packing it out slightly. And the rear reflectors were not radiused to 2.5mm, but the worst problem was that the hydrocarbons on the right hand bank were over 3000, after the machine was recalibrated we tried again but there was nothing I could change to improve it, and even with rpm at 2000 it was no better. There was talk of air leaks causing the problem so it was not going to be a pass today. And to make things worse the Caterham passed ok once they had decided that the front brakes did indeed lock up first.
The roads were very wet on the way back and I passed a building site where the Lorries had covered the road in mud so by the time I got back home the car was also covered in mud!
I had decided on the way home that the first thing to do was to remove all the spark plugs on the right hand bank and see which cylinder was playing up. Well as soon as the second one was removed it was obvious from the colour that it was the cylinder that had been playing up, but what was more annoying was that when I looked at the gap there was none! No wonder the fuel was not being burned! I fitted a new set of plugs to the bank and the idling speed rose straight away. A few minutes with a file and some sand paper saw the correct radius on the rear reflectors.
DVLA Inspection
Just before the SVA test the letter announcing the date of the DVLA inspection arrived, I had to arrange to get the car to a local recover yard on the 21st June but was not allowed to drive it there or use trade plates, it had to be transported! Well I had enough to worry with the test so I phoned the lady who did the inspections to see if a home visit was possible, it was but could be up to 6 weeks before she was in the area! That was no good so I left the appointment as it was. I got the MOT test done on 15th and this confirmed that the emissions were fine. Later that afternoon Dianna (the lady who did the inspections) phoned to say she would be in my area tomorrow and could inspect the car at my house then. Well nothing for it, a day off work, at least I could arrange for the SVA retest and start fitting my doors.
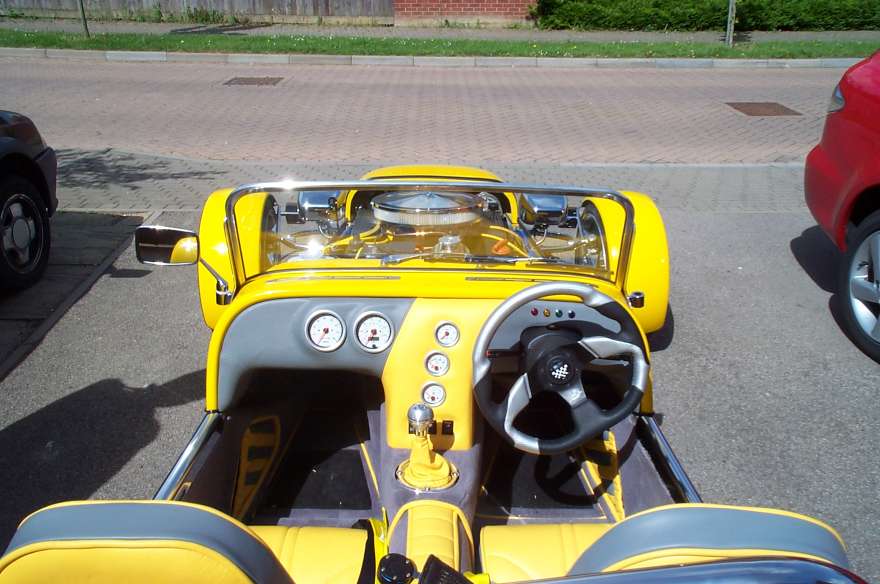
I phoned the test centre Friday morning to arrange the retest, they were going to be closed for the next week to have some brake rollers fitted and the Monday was a bank holiday so it would be Tuesday. I removed my Sierra steering wheel and fitted my nice X2 one, and almost had one door fitted when Dianna came round and looked at the engine and chassis number, she admitted she could not understand why it was necessary as it was recorded at the SVA test. She was not going to be in the office until Thursday so my registration would not be processed till then. I went in for some lunch and to decide weather to go back to work when the phone rang. It was Duncan from the SVA test centre, if I took my car down straight away he would do the retest. Well I did not need to be asked twice so despite the pouring rain I quickly finished fitting the door and was on my way Leighton Buzzard for the retest. The rain had stopped by the time I returned but the car was filthy again, but never mind I now had my MAC and the DVLA inspection was done. On Monday I took the MOT, insurance cover note and MAC to the local DVLA office, they assured me that the paperwork was fine would not be able to do the paperwork till Dianne was back in on Thursday.
A week later they phoned me to say they were £5 short because the Road Tax had gone up in the budget! Still if I went down there I could pay the money and get my tax disc, so half an hour later it was all sorted but it did seem quite an uphill struggle till then.